
AC Sensor Guide for Las Vegas Homes
Short answer: AC sensors tell your system when to cool and when to stop. In Las Vegas heat, bad sensor readings cause short cycling, uneven rooms, and higher bills. Same-day repair restores accurate control and prevents compressor damage during peak summer months.

What can cause sensor issues
- Dust buildup around thermostats and sensors
- Loose wiring or corroded connections
- Direct sunlight or heat sources near the thermostat
- Long runtime hours during peak heat
- Improper sensor placement during installation
What AC Sensors Do
- Measure indoor temperature and humidity
- Tell the system when to run or stop
- Protect equipment from unsafe conditions
Common Sensor Types in Las Vegas Homes
- Thermostat sensors: Read room temperature at the wall
- Coil sensors: Prevent freezing and protect the evaporator
- Outdoor sensors: Help heat pumps stage correctly
Where Sensors Live
- Thermostat sensors at the wall unit
- Coil sensors inside the air handler
- Outdoor sensors for heat pump operation
AC Sensor Symptoms Checklist
Use this checklist to identify sensor problems in your Las Vegas home:
- ☐ Thermostat reading is off by 3+ degrees from room temperature
- ☐ AC short cycles (turns on and off rapidly) during afternoon heat
- ☐ System runs nonstop but never reaches setpoint
- ☐ Uneven temperatures between rooms despite vents being open
- ☐ Error codes appear on thermostat or control board display
- ☐ Energy bills spike without increased usage
- ☐ Rooms feel too warm even when thermostat shows correct temp
- ☐ System starts cooling when it should be off
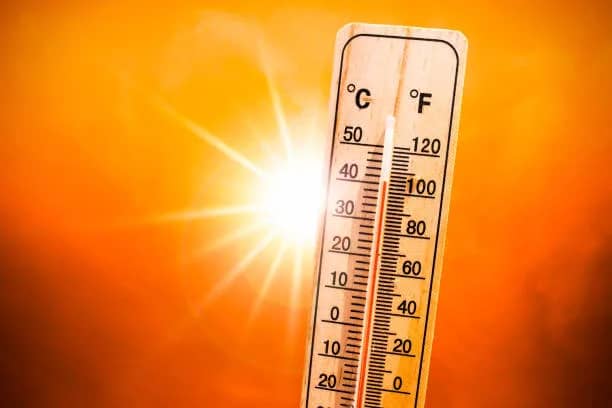
Las Vegas context: During summer heat waves (May-September), sensor drift becomes more noticeable as systems run longer. Dust storms and high temperatures can accelerate sensor failures, making early detection critical.
Quick Checks Before Calling
- Replace thermostat batteries if needed
- Clean dust around the thermostat
- Verify vents are open and unobstructed
- Compare thermostat reading to a room thermometer
Common AC Sensor Fixes
Many sensor issues have straightforward solutions. Here are the most common fixes:
- Clean sensor and thermostat: Dust buildup on sensor ports or around the thermostat can cause inaccurate readings. Gently clean with a soft brush or compressed air.
- Recalibrate thermostat: Some programmable thermostats allow manual calibration to match room temperature readings.
- Repair loose wiring: Loose or corroded connections can cause intermittent sensor failures. A technician can secure and clean connection points.
- Relocate thermostat: If placed in direct sunlight, near heat sources, or in poorly ventilated areas, moving the thermostat improves accuracy.
- Replace failed sensor: When sensors drift beyond calibration or fail completely, replacement restores accurate temperature control.
- Update control board: Sometimes the issue is with the control board reading sensors incorrectly, requiring board replacement or firmware update.
Las Vegas tip: In desert climates, thermostats on west-facing walls can read 5-10 degrees higher during afternoon sun. Consider relocating or adding a shade cover.
When to Call a Pro
While some sensor issues are DIY-friendly, professional help is essential in these situations:
- Call immediately (emergency):
- System short cycling during extreme heat (above 110°F)
- No cooling at all despite thermostat showing correct readings
- Electrical burning smell or visible sparking near thermostat
- Error codes indicating sensor failure on control board
- Schedule same-day service (urgent):
- Thermostat reading off by 5+ degrees from actual room temperature
- Rapid short cycling causing compressor stress
- Uneven cooling affecting comfort in multiple rooms
- Rising energy bills without explanation
- Schedule routine service (non-urgent):
- Minor temperature discrepancies (1-2 degrees)
- Sensor accuracy check during annual maintenance
- Planning thermostat upgrade or relocation
Las Vegas urgency note: During heat waves, sensor problems can quickly escalate to compressor damage. Don't wait if your system is short cycling or running nonstop—same-day service prevents expensive breakdowns.
What to tell your technician: Note the thermostat reading vs. actual room temperature, when symptoms started, whether issues worsen during afternoon heat, and any error codes displayed.
What a quality diagnostic should include
- Compare sensor readings to calibrated thermometers
- Check control board inputs and error codes
- Verify wiring integrity and connection points
- Confirm thermostat placement and airflow around it
Why Sensor Issues Spike in Las Vegas Summer
Las Vegas summers create unique challenges for AC sensors:
- Extended runtime hours (12+ hours daily) accelerate sensor drift
- Extreme temperatures (110°F+) amplify small reading errors
- Dust storms and high winds deposit debris on sensor ports
- Intense afternoon sun on west-facing walls heats thermostats
- High humidity during monsoon season affects sensor accuracy
These conditions make small sensor errors more noticeable, leading to comfort swings, wasted energy, and potential compressor damage from short cycling.
How Pros Test Sensor Accuracy
- Compare sensor readings against calibrated thermometers
- Check control board inputs for errors
- Verify wiring integrity and connection points
Helpful resources for Las Vegas homeowners
- AC diagnostic visit
- AC not blowing hard
- Air conditioner not cooling
- Air conditioning maintenance
- AC repair
Las Vegas Sensor Accuracy Pitfalls
- Thermostats in hallways that trap hotter air.
- Direct sun near west-facing walls in summer.
- Return vents pulling heat from garages or attics.
- Dust buildup on sensor ports after wind events.
Sensor Testing Results You Should See
- Sensor readings compared to calibrated thermometer values.
- Control board input verification and error checks.
- Wiring continuity and connection integrity notes.
- Thermostat placement assessment and airflow notes.
After-Fix Verification Checklist
- Stable temperature readings within 1 to 2 degrees.
- No short cycling after setpoint changes.
- Even room temperatures after a full cooling cycle.
- Updated thermostat settings documented for the homeowner.
FAQs About AC Sensors
Can I replace a sensor myself?
Some thermostat sensors are simple, but wiring issues require a licensed tech.
Do sensors fail often in Las Vegas?
Dust and long run times can cause drift over time.
Will a bad sensor increase my bill?
Yes. It can cause extra runtime and inefficiency.
Do you test sensors during maintenance?
Yes. We check controls and sensor accuracy.
Do you offer same-day service?
Yes. Same-day service is available in most areas.
Can a bad sensor cause short cycling?
Yes. Incorrect readings can make the system start and stop too often.
Should I relocate my thermostat?
If it is in direct sun or near a heat source, relocation can improve accuracy.
Need HVAC Service in Las Vegas?
The Cooling Company provides expert HVAC service throughout Las Vegas, Henderson, and North Las Vegas. Our licensed technicians deliver honest assessments, upfront pricing, and reliable results.
Call (702) 567-0707 or visit AC repair, maintenance, heating, or installation for details.
Share This Page
Need AC Sensor Repair or Maintenance?
We provide fast, licensed AC sensor diagnostics and repair across Las Vegas, Henderson, North Las Vegas, and the entire Valley. Our technicians test sensor accuracy, repair wiring issues, and replace failed components to restore accurate temperature control.
Regular maintenance includes sensor calibration checks to catch problems early. Schedule annual tune-ups to prevent sensor drift and maintain peak efficiency during Las Vegas summers.
Call (702) 567-0707 for same-day sensor repair or visit AC repair to schedule service. For preventive care, visit AC maintenance to book your annual tune-up.