
Key Takeaways
- Use a room-by-room Manual J load calculation (not a square-foot rule).
- Select equipment with Manual S and verify ducts with Manual D for comfort and efficiency.
- Avoid oversizing: short-cycling wastes fuel and can create uneven temperatures.
Why check a Lennox ambient sensor now?
Short answer: Summerlin and the surrounding desert heat make even small sensor errors costly. A sensor biased by only one degree can shift control behavior, increase compressor runtime, and raise utility bills. Many ambient sensors slowly drift over years due to contaminants, paint fumes, or prolonged sun exposure. Checking sensors before peak cooling demand prevents comfort complaints and reduces stress on equipment.
Try our energy savings calculator to see how much you could save.
How do you spot sensor drift of 0.5°F to 2.0°F?
The most reliable way is a side-by-side comparison with a calibrated handheld probe. Place the probe within 6 to 12 inches of the ambient sensor and allow both devices to stabilize for 10 to 15 minutes. Record readings every minute and compute the average. A steady offset in the 0.5 to 2.0 degrees F range usually indicates a bias, placement issue, or wiring degradation rather than short-term air movement. Intermittent spikes tell a different story. If offsets jump around, suspect wiring, loose connectors, or intermittent contact. Avoid basing judgments on single readings. Log multiple minutes to reduce noise from transient airflows or brief sun patches.What signs indicate solar or placement bias?
Solar or placement bias shows up as predictable temperature rises when the sun angle changes. If the ambient sensor reads higher during sunny afternoons and lower at night, it probably sees direct or reflected solar radiation. Sensors placed near glazing, clerestories, or bright walls are vulnerable. Dust and light-colored paint on nearby surfaces can reflect heat into the sensor housing. Another clue is zone mismatch: if one room reads consistently warmer than adjacent zones with similar loads, the sensor location is suspect. Temporary shading, a simple radiation shield, or moving the sensor to an internal wall can remove bias while you plan a permanent relocation.How to verify sensor readings safely?
Safety and repeatability matter when verifying sensor performance. Prepare a calibrated reference probe with a current calibration sticker or certificate. Plan your test so the environment is steady: close windows, turn off intermittent exhausts, and avoid testing during rapid sun angle changes. If the sensor requires rooftop access, lock out the unit and use proper fall protection and ladders. Do not touch live terminals without isolating power. Use the same test protocol each time so results compare cleanly. Photograph probe placement, note weather and equipment state, and store the log with the asset record. Clear documentation speeds decisions on whether to apply an offset, recalibrate, or replace the sensor.How to compare sensor output to a calibrated probe?
Place the calibrated probe 6 to 12 inches from the sensor element in the same air mass. Avoid direct diffuser air or sitting the probe against a wall. Give both sensors at least ten minutes to reach steady values. Record both readings at one-minute intervals for ten to fifteen minutes, then compute rolling and mean offsets. Label and timestamp your readings and include notes about equipment running or external influences. This log helps technicians reproduce the test or verify the need for formal calibration. Keep images showing probe placement and sensor condition for records.What tolerance should you accept for Lennox sensors?
A practical target for occupied spaces is ±0.5 degrees F. This tolerance minimizes comfort complaints and maintains efficient cycling. Less critical areas, such as service corridors or storage rooms, may accept up to ±1.0 degree F without major issues. If your control strategy relies on tight deadbands or zone-by-zone balancing, aim for tighter tolerances. When a sensor exceeds the tolerance consistently, apply a controlled offset only as a short-term measure. Plan a permanent repair or calibration if the error persists. Tight tolerances matter most in small rooms, densely controlled zones, or when equipment cycles are marginal.How to log and interpret temperature offsets?
Record probe and sensor readings each minute over a stable interval. Calculate the mean and standard deviation. A steady mean offset with low deviation points to calibration or placement bias. Large deviation or drift during the test points to intermittent contacts, wiring issues, or sensor element failure. Write a short narrative with the log. Note weather, sun angle, equipment status, and any nearby operations. Photograph the sensor and probe placement. These notes speed diagnosis and support decisions on lab calibration or replacement.When should you recalibrate or replace the sensor?
Decide using three factors: the size and character of the drift, sensor age and exposure, and access difficulty. Small, steady offsets under about 1.0 degree F often respond well to on-site recalibration or a software offset. Severe errors, erratic readings, or visible physical damage usually call for replacement. Consider labor and access costs: rooftop pulls and re-mounts add to overall expense and may tip the balance toward a new sensor. Document your decision and the pre-repair log. If warranty or formal traceable calibration is required, use a NIST-traceable lab and capture chain-of-custody details. For repeat problems, replacement often provides longer uptime and fewer callbacks than repeated recalibrations.When does drift mean recalibrate instead of replace?
If the error is consistent, the sensor housing looks sound, and wiring checks out, recalibration can be effective. On-site recalibration or applying a verified controller offset is cost-effective when the element itself is stable. Use recalibration when you expect the sensor to remain accurate after correction for a reasonable period. Avoid using offsets as permanent fixes. Offsets hide the symptom and can mask ongoing degradation. If the sensor repeatedly drifts back, replacement is the better long-term option. Keep a record of all offsets applied and the dates for future review.What are signs of irreversible sensor failure?
Irreversible failure often shows as noisy or wildly fluctuating readings, values that drop to zero or to implausible numbers, or physical damage like corrosion and water staining. If the sensor responds erratically when probed or when you slightly disturb the wiring, the sensing element or internal electronics are likely failing. In these cases, replacement restores stable control faster than extended troubleshooting. Also consider environmental exposure: sensors used outdoors, near corrosive chemicals, or in wet locations may fail sooner and are better off replaced with a properly rated unit.What are quick on-site fixes to try now?
Start with low-cost, low-risk steps. Cleaning the sensor, re-seating connectors, and checking mounting and shielding often solve common biases. Test after each action to see whether readings return to tolerance. Keep safety in mind: isolate power before opening sensor heads and use proper fall protection for rooftop access. If a steady and verified offset remains, apply a documented software offset only as a temporary measure while you schedule a permanent repair or lab calibration. Document all steps and record the before-and-after logs to justify further action if drift returns.Can cleaning the sensor fix misreads?
Yes. Dust, paint overspray, or thin films can insulate the sensing element and slow its response. A careful cleaning with a soft brush, low-pressure canned air, or a lint-free swab often restores normal response. Avoid liquids unless the sensor is rated for them and allow full dry time before reassembly. After cleaning, let the sensor sit for several minutes to re-stabilize. Then repeat your side-by-side test with the calibrated probe. Many sensors return within tolerance after a proper clean and short stabilization period.How to re-seat wiring and connectors?
Power down at the service switch and verify the circuit is de-energized. Open the sensor head and inspect wire ends for corrosion, broken strands, or loose screws. Cut back damaged wire, re-strip to expose fresh copper, and use proper crimps or ferrules for a solid connection. Tighten screws to the recommended torque if available. Loose terminals cause intermittent errors that look like drift. Once re-seated, re-run the stabilized probe test. Log the readings and note any improvement. If wiring runs are long or subject to moisture, consider replacing sections with weather-rated or shielded cable.Are simple offsets programmable in controls?
Many Lennox controllers and building automation systems allow a software offset to correct a steady and verified bias. Use this feature only after confirming the offset with a calibrated probe and logging results. Record the applied offset, date, and reason in maintenance notes. Do not use offsets to mask intermittent faults or failing hardware. Offsets are useful to preserve comfort until permanent repairs can be scheduled. Plan to remove the offset once the sensor is recalibrated or replaced.
Typical calibration costs and ROI
Costs vary by approach. Field fixes like cleaning and wiring checks often cost under $100 in labor or can be done by trained staff. Lab calibrations typically range from $75 to $200 per sensor plus shipping and handling. Replacement sensors vary by model and access; rooftop jobs raise labor costs. Include travel and permit fees for rooftop access when estimating total expense. If your Lennox system has issues beyond sensor drift, our full Lennox repair guide for Las Vegas details costs for every common problem by series and part. Compare costs to estimated energy savings. Small controlled corrections often reduce compressor runtime and yield measurable savings in one cooling season. Make decisions using documented pre- and post-fix logs and normalize savings for degree days or comparable weather periods.How much does a NIST-traceable calibration cost?
Expect about $75 to $200 per sensor for lab calibration, with added shipping and handling. Some labs charge setup fees or minimums for small batches. Ask about volume discounts if you send multiple sensors. Factor in turnaround time and downtime for sensors removed from service. A lab certificate provides traceable proof that can satisfy warranty or compliance requirements. Keep the certificate in asset files. If the sensor controls critical spaces, traceable calibration is often worth the added cost.What ROI should managers expect from fixes?
Field fixes commonly return 2 to 8 percent energy savings by removing bias and reducing compressor runtime. The exact ROI depends on system size, run hours, and local utility rates. In many small commercial or residential systems, payback for a simple fix can occur within a single cooling season. Measure savings with runtime logs or short before-and-after tests normalized for weather. Use utility bills or BAS data to quantify longer-term impacts. Documentation of savings helps justify further investment in calibration programs.Schedule a technician visit
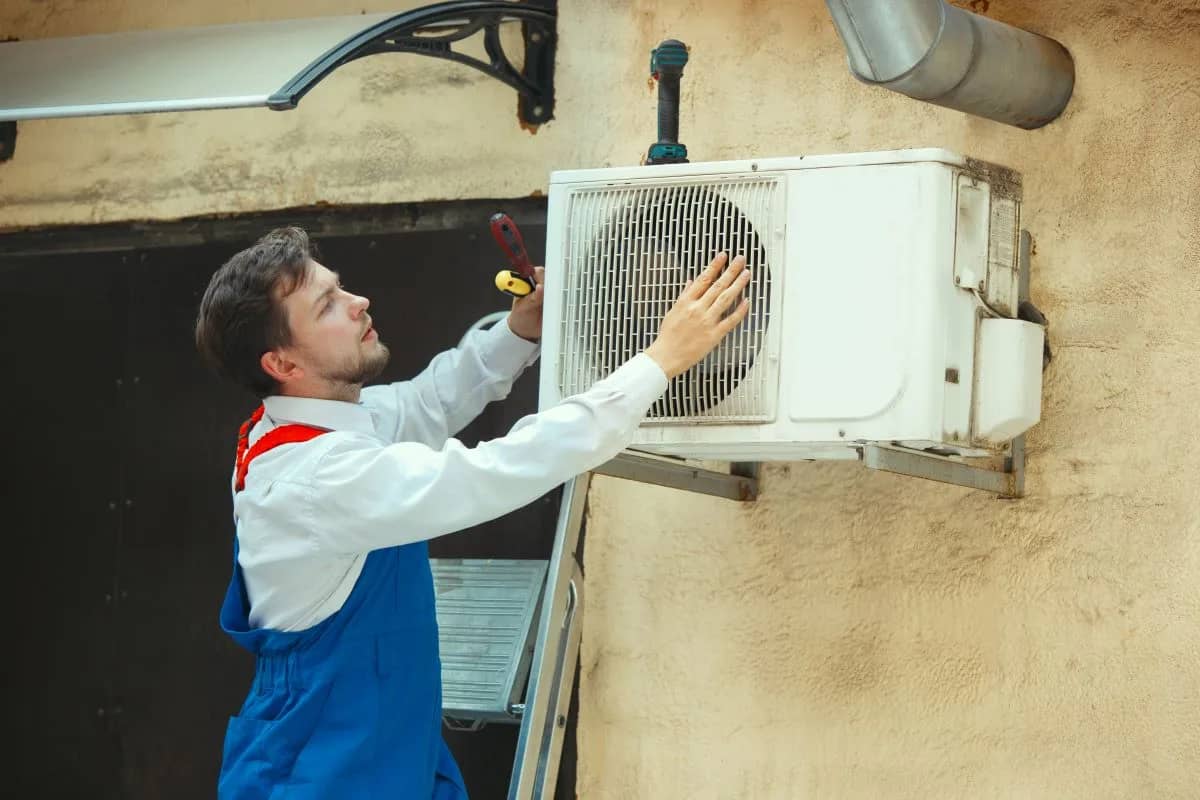
Call a qualified technician when offsets exceed about 1.0 degree F, when readings are intermittent, or when rooftop access, traceable certificates, or BAS remapping are required. Certified technicians work faster and safer. Ask that they bring NIST-traceable probes and logging tools and request before-and-after documentation to keep with your maintenance records. Local technicians reduce travel time and often complete on-site verification and simple repairs in one visit. If you need formal lab calibration, the technician can swap sensors to minimize downtime and manage shipping to a traceable lab.How to book service online?
Call The Cooling Company at (702) 567-0707 for same-week scheduling in Las Vegas, Henderson, and North Las Vegas. When you call, provide the sensor location, unit model, BAS or controller logs, and any access notes. This helps the tech come prepared and shortens diagnostic time. If you are outside our service area, ask for NATE-certified technicians who bring NIST-traceable probes. Those qualifications help ensure accurate testing and safe rooftop work wherever you are located.What to expect during a technician visit?
A technician will confirm safe access and verify the circuit is de-energized when required. They place a calibrated probe next to the sensor and log steady readings. The tech inspects wiring, mounting, and controller mapping, and then tests after any repairs. You receive before-and-after results, photos, and clear recommendations. If lab calibration is needed, the technician explains turnaround time, cost, and how they will swap or label parts to minimize downtime. Expect a short written report and photos as part of the service package.Schedule a technician visit with The Cooling Company
Contact The Cooling Company at (702) 567-0707 for Lennox ambient sensor checks, recalibration, or replacements in Las Vegas, Henderson, and North Las Vegas. Our NATE-certified techs bring calibrated probes and can document before-and-after results. If you are outside our service area, ask for NATE-certified technicians and NIST-traceable probes to get consistent, traceable results where you are. Document any onsite fixes and keep logs and photos with the asset record. That documentation helps manage warranties, justify traceable lab work, and speed future diagnostics.You Might Also Like
This list links to related troubleshooting and cost guides that help you plan repair budgets and learn common HVAC symptoms. Read them to better understand repair scopes, likely costs, and other system behaviors. Use these resources when preparing to call a technician or when deciding between field fixes and lab calibration.- "ac repair costs"
- "troubleshooting hvac odors"
- "ruud furnace problems"
- "trane furnace repair henderson"
- "how much to install hvac system in old house"
Related service: Need professional HVAC service? Explore our AC repair and heating services services for Las Vegas homeowners.
Need HVAC service help in Las Vegas?
If you're facing an HVAC emergency in Las Vegas, Henderson, or North Las Vegas, The Cooling Company offers fast, reliable service from licensed technicians. We understand that heating and cooling emergencies don't wait for business hours. Call us now at (702) 567-0707 for emergency service. Our team is ready to help restore your comfort quickly and safely.About The Cooling Company
The Cooling Company has been serving the Las Vegas valley with professional HVAC services for over a decade. Our team of licensed, NATE-certified technicians specializes in air conditioning repair, heating system maintenance, and complete HVAC installations. We're committed to providing honest, reliable service with upfront pricing and a 100% satisfaction guarantee on all work performed.- Phone: (702) 567-0707
- Reviews: 4.8/5 stars (780+ reviews) - See reviews
Service Areas
We proudly serve homeowners and businesses throughout the Las Vegas metropolitan area, including Las Vegas, Henderson, and North Las Vegas. Our service technicians are available for same-day appointments in most areas, with emergency service available 24/7 for urgent HVAC issues.References
- U.S. Department of Energy (Energy.gov) (accessed 2026-01-02)
- U.S. Environmental Protection Agency (EPA) (accessed 2026-01-02)
- ASHRAE (Standards and guidance) (accessed 2026-01-02)
- ENERGY STAR (Heating & cooling) (accessed 2026-01-02)
Need HVAC Service in Las Vegas?
The Cooling Company provides expert HVAC service throughout Las Vegas, Henderson, and North Las Vegas. Our licensed technicians deliver honest assessments, upfront pricing, and reliable results.
Call (702) 567-0707 or visit HVAC services, HVAC maintenance, heating, or AC repair for details.