
Short answer: Prepare your home for cold weather with seven targeted checks that boost comfort, trim energy use, and catch safety issues early. If your system includes a furnace, boiler, or heat pump, these checks pair well with routine heating maintenance to catch small issues before they turn into no-heat emergencies. This guide walks you through concrete actions—changing filters, clearing obstructions, tuning the thermostat, inspecting vents and flues, watching condensate drains, spotting air leaks, and verifying CO detector placement. Source information and further reading are included where relevant.
Key Takeaways
- Replace or clean filters every 1–3 months and keep returns and supply ducts unobstructed to maintain airflow and efficiency.
- Schedule an annual professional tune-up for combustion appliances; for heat pumps, plan a biannual check. Call a pro for gas, refrigerant, or electrical concerns.
- Start with duct airflow and safety first: sealing ducts and adding attic insulation typically yields bigger savings than chasing minor efficiency tweaks alone.

What are the 7 quick checks?
These checks are high-impact and doable in under an hour if you stay focused. Begin with visible upgrades (filters, return grills, thermostat) and then proceed to drains, vents, air leaks, and CO detectors. Each step includes a practical test you can perform with common tools.1) Change or clean the air filter?
How often: Every 1–3 months, depending on usage, pets, and dust. Reusable filters should be cleaned per the manufacturer’s directions. What to do: Turn off the system at the thermostat or switch before touching the filter. Open the filter slot, note the airflow arrow, remove the filter, and inspect it. If the filter is gray, black, or so dirty that light won’t pass through, replace it. Disposable pleated filters cost roughly $10–$50 each; for most homes, a MERV 6–11 balance offers good filtration without overburdening the blower. If you have allergies or asthma, you might consider higher efficiency—but be mindful that very high MERV can reduce airflow and require a stronger blower. Washable or electrostatic filters can be rinsed and air-dried; typical cleaning interval is every 1–2 months. Why it matters:- A clogged filter increases fan energy use and reduces heat transfer. A heavily clogged filter can drop airflow by 15–40% and trigger short cycling.
- After replacement, feel air at a nearby supply register. You should notice a stronger breeze than before.
- Listen for a reduction in blower noise or fewer short cycles once the new filter is in place.
2) Clear returns and supply registers?
Why: Blocked returns or supplies choke airflow, forcing the system to work harder and waste energy. What to do:- Walk through every room with the thermostat set to heat. Place a hand over each supply and return register to feel airflow for 5–10 seconds.
- Move or remove furniture, rugs, drapes, or toys that block registers. Leave 3–6 inches of clearance in front of return grills.
- Remove grills and vacuum behind them to remove dust buildup. If screws are stubborn, apply a bit of penetrating oil and give it another try or call a pro.
- Use a tissue or lightweight paper in front of a register. If it flutter's from the airflow, you have movement.
- If a supply register feels warm but airflow is weak, there may be a downstream duct blockage or a closed damper somewhere in the system.
3) Test and program the thermostat?
Basic checks you can do:- Compare the thermostat’s reading to a small digital thermometer placed nearby. If the reading differs by more than 2°F, recalibrate or replace the thermostat.
- Create a setback schedule: reduce the setpoint by 7–10°F for 6–8 hours (for example, 68°F when you’re home and 60–63°F while sleeping or away) to cut heating use.
- If you have a heat pump, follow the manufacturer’s setback guidance. Avoid aggressive setbacks that trigger electric auxiliary heat.
- Make sure the thermostat is calling for heat or cool and that the system responds promptly. Note any long delays, repeated starts, or error messages.
- For wired thermostats, check for loose wires or failed relays; these tasks are best left to a pro.
- A consistent setback of 7–10°F for 8 hours daily can cut heating costs by about 10% in many homes.
4) Inspect vents, flues, and exhausts for blockages?
What to inspect:- Chimney flues, furnace exhaust vent terminations, and direct-vent pipe caps.
- Dryer vents and combustion air louvers.
- From the ground, ensure outdoor vent caps are clear of leaves, nests, or snow. For roof chimneys, use binoculars or hire a professional if you’re not comfortable accessing the roof.
- Inside, look for soot, heavy rust, or obvious debris at the flue connection. If you see stains or smell exhaust, stop and call a technician.
- If you notice a yellow flame, excessive soot, odors, or a CO detector chirp, these indicate poor combustion or a blocked flue and require a professional assessment immediately.
5) Check condensate drains and pans?
Applicable to: high-efficiency furnaces, boilers with condensate, and some heat pumps. Steps to do now:- Turn off power to the unit before inspecting.
- Locate the condensate trap and the outdoor discharge line. Use a wet/dry vacuum to remove clogs from the line or trap.
- Periodically flush the line with a 50/50 mix of water and vinegar to reduce slime buildup, especially during heavy use.
- A full drain pan, leaks under the unit, or a system that shuts off due to a float switch indicate a persistent clog, a failed pump, or a damaged pan.
6) Look for visible air leaks and insulation shortfalls?
What to look for:- Gaps around window and door frames, openings for pipes and electrical outlets on exterior walls, and recessed lighting.
- Gaps around attic hatches and plumbing stacks or chimneys.
- On a breezy day, light a stick of incense or a candle (keep a safe distance from flammables) and sweep it near suspected gaps. Watch the smoke or flame for drafts.
- A handheld infrared thermometer can help spot cold surfaces near frames or ceilings, which signal insulation gaps.
- Seal stationary gaps up to 1/4 inch with caulk; apply weatherstripping on movable joints like doors and operable windows.
- Install door sweeps where needed.
- Improve attic insulation to R-38–R-60 for cold climates and seal rim joists. If ducts run through unconditioned spaces, insulate those ducts as well.
7) Verify carbon monoxide detector placement and function?
Placement:- Install at least one CO detector on every level and outside sleeping areas. Place detectors 5–20 feet from sleeping rooms.
- Test detectors monthly using the test button and replace batteries at least annually or use 10-year sealed batteries.
- Replace CO detectors every 7–10 years per manufacturer recommendations.
- Evacuate the home immediately and call 911 and your gas utility or supplier from a safe location. Do not re-enter until professionals declare it safe.
Which checks need a professional?
Any work involving combustion safety, refrigerant systems, gas piping, flue or heat exchanger testing, or electrical components inside the equipment should be handled by licensed technicians.What a professional tune-up typically includes
Gas furnace or boiler tune-up basics:- Visual inspection and cleaning of burners, ignition, and flame sensor.
- Combustion testing and CO check; draft and vent inspection.
- Electrical safety checks, control and thermostat verification, lubrication of motors where applicable, belt checks, and measurement of airflow and temperature rise.
- Outdoor coil and compressor checks, refrigerant level verification, contactor and reversing valve testing, and defrost cycle inspection.
How professionals check carbon monoxide and the heat exchanger
- Technicians use electronic gas analyzers to sample flue gases and ambient air.
- They perform a visual heat exchanger inspection and combustion testing. If a cracked exchanger is suspected, the unit is shut down until repaired or replaced.
Typical pro costs (U.S. average ranges)?
Basic annual tune-up: roughly $80–$250. Heat pump spring/fall check: about $100–$300 per visit. Refrigerant leak diagnosis and recharge: $150–$500+ depending on refrigerant type and leak complexity. Emergency after-hours service: an extra $150–$500+. Replacement furnace: typically $2,000–$6,000+ depending on unit and installation. Prices vary by region and equipment. Always ask for an written, itemized estimate.When to call for emergency service
Leave and seek help immediately if you experience any of these: CO alarm activation or symptoms such as headache, nausea, dizziness. Smell of natural gas or propane; exit the home and call the utility from a safe location. Smoke, burning smell, flames, or sparks from the HVAC equipment. Complete loss of heat during cold weather that risks frozen pipes. If it’s safe, turn off the appliance and shut the gas valve at the meter only if you know how.How to prioritize checks for maximum savings
Start with airflow and safety—clean filters, clear returns, and verify combustion safety. These steps often deliver the fastest savings and lower the risk of mid-winter failures. Step-by-step pre-winter priority list: 1) Change or clean the filter (10–30 minutes). Replace if very dirty. 2) Clear returns and supply registers (10–30 minutes). Walk through each room and clear obstructions. 3) Test the thermostat and set a savings schedule (15–45 minutes). 4) Inspect condensate drains and outdoor venting (15–30 minutes). 5) Identify and seal obvious air leaks; add weatherstripping or caulk where cost-effective. 6) Check CO detectors and battery replacement (5–10 minutes each). 7) Book a professional combustion safety tune-up for gas or oil appliances (45–120 minutes appointment). Examples of expected savings:- A clean filter and clear returns can restore airflow and reduce run time by roughly 5–15% in many homes.
- Duct sealing and insulation in leaky systems can cut distribution losses by 10–30%.
- A programmable thermostat with a 7–10°F setback for 8 hours daily commonly yields about 10% in heating costs.
Duct and insulation upgrades that pay back fast
Sealing and insulating ducts in attics, crawlspaces, and garages often delivers strong returns. Look for these indicators:- Cold rooms despite warm ducts inside the space.
- Visible gaps, disconnected joints, or dusty insulation on ducts.
- Seal small gaps with foil-backed mastic or UL 181 foil HVAC tape (avoid cloth-backed duct tape).
- Insulate ducts in unconditioned spaces with duct wrap to at least R-6.
- For full-home duct testing and sealing (blower door and aerosol sealing), professional sealing costs range from several hundred to over $1,000, depending on house size.
System-specific checks?
Different systems require tailored checks. Use these alerts as a quick reference while you’re on the job.Furnace (gas or oil)
Replace filters every 1–3 months. Keep the area around the furnace clear of debris and combustibles. Inspect the flue or vent for rust or soot. Cracks or heavy rust warrant a pro inspection. Note the temperature rise across the furnace (typical mid-efficiency units run about 40–70°F rise). A technician can measure this accurately. For oil systems, follow the manufacturer’s maintenance schedule for nozzle, filter, and oil line checks.Boiler (hydronic)
- Schedule an annual combustion tune-up and check the pressure relief device.
- Inspect the expansion tank pressure and bleeder valves on radiators; bleed air if you notice cold spots.
- Look for leaks at joints and around the circulator pumps.
Heat pump
- Service twice per year (spring and fall) to cover heating and cooling seasons.
- Clean and inspect the outdoor coil; keep a 2–3 foot clearance around the unit.
- Test the defrost cycle and reversing valve. A dirty coil or incorrect refrigerant charge reduces heating efficiency and increases costs.
How to decide repair vs replacement
Think about age, repair costs, efficiency gains, and safety concerns. Typical useful life:- Furnaces: 15–20 years
- Boilers: 15–30 years, depending on type
- Heat pumps: 10–15 years
- If the repair costs exceed about 50% of a new unit’s price and the system is near the end of its life, replacement is often the better long-term value.
- If a major safety item fails (for example, a cracked heat exchanger), shut down the unit and replace or repair immediately.
- Compare current efficiency ratings (AFUE, HSPF, SEER) with those of a new unit. A higher-efficiency replacement can produce substantial fuel savings; calculate payback using your local energy costs and typical annual usage.
DIY safety and when to stop
Do these tasks yourself:- Replace or clean filters, vacuum registers, perform basic thermostat checks, clear minor condensate clogs, and seal small air leaks.
- Any work on gas lines or gas valves, burner adjustments, or inspections of the heat exchanger or flue welding.
- Refrigerant handling or compressor work (requires EPA-certified technician).
- Internal electrical faults, motor work, or major ductwork changes.
Tools and small items to keep on hand
Replacement filters in the correct size (measure the slot; common sizes include 16x20x1, 20x25x1). Disposable gloves, safety goggles, and a flashlight. Wet/dry vacuum for condensate lines. Small magnetic screwdriver set for grills and thermostats. Caulk gun, weatherstripping, and a few tubes of caulk for quick air-seal fixes. Small digital thermometer or a handheld hygrometer for basic checks. An inexpensive anemometer (about $20–$60) if you want better airflow data. (Source: Building America Solution Center HVAC Guides)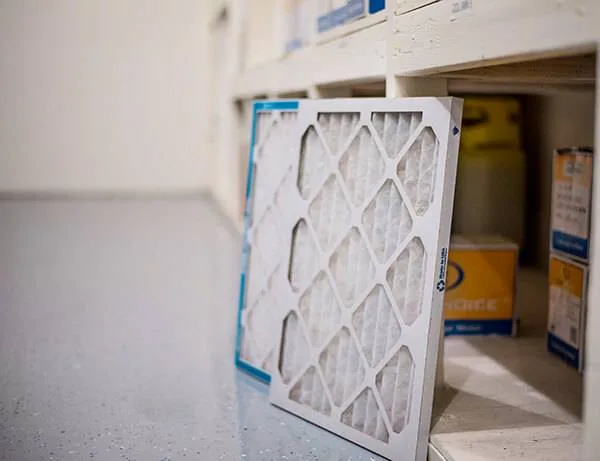
Monthly and pre-winter checklist (printable)
Monthly:- Check and replace/clean the filter if dirty.
- Vacuum return and supply grills to remove dust buildup.
- Test CO detectors and smoke alarms; replace batteries as needed.
How long do routine checks take?
Filter change and register cleaning: 10–30 minutes. Thermostat programming and testing: 15–45 minutes. Condensate line vacuum and flush: 20–40 minutes. Professional tune-up: 45–120 minutes, depending on system complexity.Common wear items and replacement intervals
Air filters: every 1–3 months. Igniters and flame sensors: 5–10 years, depending on use and conditions. Capacitors and relays: 5–15 years; failures can cause blower or compressor issues. Compressors: 10–15 years; replacement is expensive and often a sign to replace the whole unit.Rebates, incentives, and how to get them
- Look for federal tax credits, state energy programs, and utility rebates for high-efficiency equipment and heat pumps.
- Many programs require pre-approval and specific contractor work to qualify. Save invoices and equipment model numbers for your records.
Ready to act: a simple weekend plan
Saturday- Replace or clean the filter: 10–20 minutes.
- Walk each room and clear registers and returns: 20–40 minutes.
- Test CO detectors and swap batteries if needed: 10–20 minutes.
- Program thermostat schedule and verify readings: 15–45 minutes.
- Flush condensate line with a wet/dry vacuum and a vinegar rinse: 20–40 minutes.
- Check outdoor vent caps and clear debris or snow when needed: 10–30 minutes.
Final practical tips
- Keep spare filters on hand and note the size on the slot or furnace door.
- Log service dates and notes in a home maintenance app or a simple notebook.
- When major work is needed, collect at least three bids and compare off-season pricing, equipment efficiency, and warranty terms.
Related reading: what to explore next?
AC and Furnace: Signs You Need Repair Today Before Costs Soar. HVAC System Types: How to Choose the Best One for Your Home Now. Air Conditioner Not Working: AC Not Working 12 Fast Fixes to Restore. Cost to Replace AC: What to Budget for Your New System. Air Handler Installation Cost: What to Budget Before Buying. Furnace Types: Fuel, Technology, Efficiency. Cost to Add HVAC to an Old House: Typical. Furnace Prices: Total Cost to Buy, Install. Furnace: How It Works, Common Problems, Costs. Furnace Size: Why Sizing Matters.Local essentials and challenges for Las Vegas maintenance
Dry desert dust loads filters faster than many climates, and wind events can push debris into outdoor equipment. Many valley homes have ductwork in hot attics, which can loosen joints over time and reduce airflow when heating season starts. Plan a pre-winter visit and recheck registers after big temperature swings.Cost drivers for heating maintenance
Pricing varies with system type, accessibility, and whether combustion analysis, airflow testing, or condensate service is included. Heat pumps add refrigerant checks and defrost testing, while older furnaces may require extra safety inspections.Decision guidance: DIY checks vs. pro tune-up
If your system is under 10 years old and running quietly, a standard tune-up is usually enough. If you notice uneven rooms, frequent cycling, or stale odors, ask for a deeper airflow and duct review. For equipment over 15 years, weigh maintenance costs against replacement savings.Prevention steps that reduce repair bills
Replace filters on schedule, keep returns unobstructed, and clear storage away from furnaces or air handlers. Add weatherstripping around doors and attic hatches to reduce heat loss and reduce run time.Neighborhoods we serve in the Las Vegas Valley
- Summerlin South
- Downtown Las Vegas
- Paradise
- Whitney Ranch
- Spring Valley
- Henderson
- North Las Vegas
- Enterprise
Trust and guarantees from The Cooling Company
- Serving Las Vegas since 2011 with 55+ years of combined experience
- Licensed, EPA-certified technicians and code-compliant service
- BBB A+ rated and Lennox Premier Dealer
- 100% satisfaction guarantee with clear service documentation
Service area map
Need HVAC Service in Las Vegas?
The Cooling Company provides expert HVAC service throughout Las Vegas, Henderson, and North Las Vegas. Our licensed technicians deliver honest assessments, upfront pricing, and reliable results.
Call (702) 567-0707 or visit heating services, furnace repair, heating maintenance, or heat pump installation for details.