
Short answer: A standard heat pump replacement in Las Vegas takes 6 to 10 hours and follows a predictable sequence: arrival and walkthrough (30 minutes), old system removal (1-2 hours), new equipment placement (1 hour), refrigerant line work (1-2 hours), electrical and thermostat wiring (1-2 hours), system startup and commissioning (1 hour), and a homeowner walkthrough (30 minutes). Heat pumps require additional commissioning steps that a straight AC swap does not -- reversing valve testing in both heating and cooling mode, defrost cycle verification, and heat-pump-specific thermostat programming. Prepare your home the day before by clearing access paths, securing pets, and arranging alternate cooling if installing in summer. Call The Cooling Company at (702) 567-0707 to schedule your heat pump installation.
Key Takeaways
- Total installation time: 6 to 10 hours for a standard residential heat pump replacement. Complex jobs involving ductwork, electrical panel upgrades, or dual-fuel configuration can extend to a second day.
- Home prep matters. Clear 5 feet around the outdoor unit and a path from the front door to the equipment. Secure pets in a closed room. Expect noise, vibration, and workers moving between indoor and outdoor spaces throughout the day.
- Summer installations get hot. Your AC will be off for most of the day. Las Vegas crews typically start at 6:00-7:00 AM during summer months to maximize morning hours before extreme heat. Indoor temperatures can reach 90+ degrees -- plan accordingly.
- Heat pumps need more commissioning than AC-only systems. Installers must test the reversing valve in both heating and cooling mode, verify defrost cycle operation, configure auxiliary and emergency heat settings, and program the thermostat for heat pump operation.
- Permits and inspections are required. Clark County requires a mechanical permit for heat pump installation. Your contractor should pull the permit before installation day and schedule inspection afterward. Unpermitted work can void warranties and create problems when selling your home.
- Warranty registration has a deadline. Most manufacturers require registration within 60 to 90 days of installation. Missing this deadline can reduce your parts warranty from 10 years to 5 years.
- Watch for red flags. No permit, skipping the load calculation, not testing both heating and cooling modes, rushing the thermostat setup, and not leaving documentation are all signs of a substandard installation.
Before Installation Day: Your Prep Checklist
Good preparation prevents delays on installation day. Handle these tasks the evening before your scheduled install.
Clear the work areas
Remove everything within 5 feet of the outdoor condenser unit -- patio furniture, potted plants, garden hoses, and storage bins. If the unit sits in a side yard, make sure the gate opens fully and the path is clear from the truck to the equipment pad. Inside, clear 4 feet around the air handler or furnace (garage, utility closet, or attic in most Las Vegas homes).
Secure pets and plan for children
Keep pets in a closed room away from work areas for the entire day. Doors will be open repeatedly as the crew moves between indoor and outdoor spaces. If you have young children, arrange care or activities away from the house -- power tools, brazing torches, and exposed wiring are genuine hazards.
Expect noise and plan around it
Installation involves sawzalls, drills, brazing torches, and vacuum pumps. The noise is comparable to a kitchen remodel. If you work from home, plan to work elsewhere. Inform close neighbors, especially if you share a wall.
Ensure clear paths to the thermostat and electrical panel
The crew needs access to your thermostat, main electrical panel, and outdoor disconnect box. If your panel is behind shelving in the garage, move it the night before.
Arrange alternate cooling for summer installations
This is the most important prep step for Las Vegas summer installs. Your AC will be off for 6 to 10 hours. In July and August, indoor temperatures climb above 90 degrees within two to three hours. Plan accordingly:
- Spend the day at a family member's home, a library, or a mall
- Pre-cool your home to 68-70 degrees the night before (thermal mass buys extra time in the morning)
- Set up a portable evaporative cooler or fans in one room as a refuge
- Stock a cooler with cold water for the crew -- they are working in your garage at 110 degrees
- Board pets rather than leaving them in a hot house
Installation Day Timeline: Hour by Hour
This timeline covers a standard residential heat pump replacement using existing ductwork and refrigerant line routing. Actual times vary based on system complexity and whether additional work is required.
Arrival and walkthrough: 30 minutes
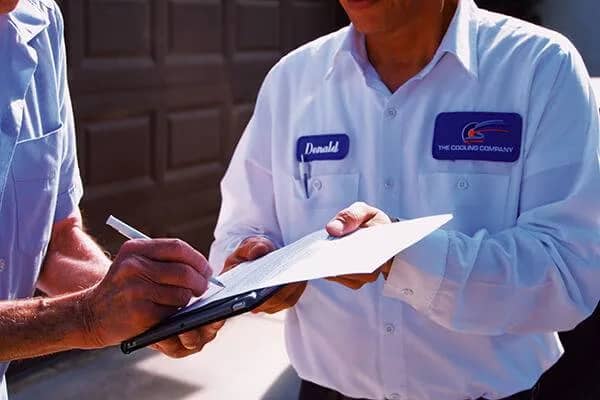
The lead installer and crew arrive between 7:00 and 8:00 AM (6:00-6:30 AM in summer to beat the heat). The lead walks through the scope of work, confirms equipment placement, reviews the thermostat location, and lays down floor protection. This is your chance to confirm the equipment model and serial number match what was quoted and ask about the day's sequence.
Old system removal: 1 to 2 hours
The crew recovers refrigerant into a recovery tank (EPA-mandated -- venting is illegal), disconnects electrical wiring, cuts refrigerant lines, and removes the outdoor condenser and indoor components being replaced. Rooftop units common in older Las Vegas homes take longer and may require rigging equipment. Expect grinding, cutting, and banging sounds.
New equipment placement: 1 hour
The outdoor condenser is positioned on the concrete pad, which must be level, at least 3 inches above surrounding grade, and allow adequate airflow on all sides. If the existing pad is cracked, undersized, or unlevel, the crew installs a new one -- a poor foundation leads to refrigerant line stress and vibration noise within the first year.
Indoor equipment (evaporator coil or air handler) is set and secured. The crew verifies clearances and alignment with existing ductwork connections.
Refrigerant line installation or replacement: 1 to 2 hours
The crew connects the copper refrigerant lines (the lineset) between the outdoor condenser and the indoor evaporator coil. Existing linesets can often be reused if the diameter is correct and the copper is in good condition. If the new system requires different line sizes or the existing lines show corrosion or damage, the crew runs new lines.
Brazing connections require a nitrogen purge -- flowing dry nitrogen through the lines during brazing to prevent oxidation inside the copper. After brazing, the crew pressure tests for leaks, then pulls a vacuum to remove moisture. A proper vacuum should hold at 500 microns or below for at least 20 minutes. Moisture left in the system causes acid formation that destroys compressor internals over time.
In Las Vegas, refrigerant line insulation is critical. Desert UV degrades standard foam insulation within 12 to 18 months, exposing bare copper. Uninsulated suction lines in 115-degree ambient heat cause measurable efficiency loss. Quality installers use UV-resistant insulation or apply UV-protective wrapping on every exposed section.
Electrical connections and thermostat wiring: 1 to 2 hours
The installer connects the outdoor unit to its dedicated circuit and installs or replaces the outdoor disconnect box. The existing circuit usually works for a same-capacity replacement. Switching from gas heating to an all-electric heat pump may require a panel upgrade or new circuit.
Thermostat wiring is where heat pump installations differ most from AC-only installs. A heat pump thermostat requires connections that a cooling-only system does not:
- O/B wire: Controls the reversing valve to switch between heating and cooling modes
- Auxiliary/emergency heat wire (W2/E): Activates backup heat strips -- must be wired correctly to prevent them from running unnecessarily
- Common wire (C): Required by all modern smart thermostats; older Las Vegas homes often lack this wire
The thermostat must be heat-pump compatible. Standard AC-only thermostats lack the programming logic for reversing valve control, defrost management, and auxiliary heat lockout. Most modern smart thermostats (Ecobee, Nest, Honeywell) support heat pumps, but the installer must configure the correct system type in settings.
System startup and commissioning: 1 hour
Commissioning is where a professional installation separates itself from a hack job. The installer charges the system with refrigerant per manufacturer specs, then runs a full commissioning sequence:
- Cooling mode test: Run the system for at least 15 minutes. Measure the temperature split across the evaporator coil (typically 16-22 degrees) and check refrigerant pressures against specs.
- Heating mode test: Switch the reversing valve to heating mode and verify warm air at supply registers. This step is unique to heat pumps and is skipped by some installers because "it's summer." Do not accept this -- the reversing valve must be tested on installation day.
- Defrost cycle verification: The installer verifies the defrost board is configured correctly and initiates a test cycle to confirm the reversing valve switches smoothly in both directions.
- Airflow measurement: Measure CFM at supply registers to verify it matches rated airflow. Low airflow causes frozen coils and compressor damage.
- Electrical readings: Measure compressor amperage, fan motor amperage, and voltage against manufacturer nameplate specs.
A thorough commissioning takes 45 to 60 minutes. If the crew finishes in 10 minutes and says "all good," they skipped steps. Ask specifically whether they tested heating mode and measured airflow -- these checks are required by manufacturer installation manuals and are a condition of warranty coverage.
Homeowner walkthrough and education: 30 minutes
The lead installer walks you through the completed system, covering thermostat operation in all modes, what the defrost cycle looks and sounds like (steam from the outdoor unit and brief cool air from vents -- both normal), when auxiliary heat activates, how to change the air filter (every 30-90 days, more often during dust storms), and where the outdoor disconnect is located.
The installer should leave you with equipment manuals, warranty cards, permit documentation, and a commissioning report showing all measurements taken during startup. If you are not given a commissioning report, ask for one.
What Makes Heat Pump Installation Different from AC-Only
If you have had an AC replacement before, a heat pump swap is similar but has meaningful differences in commissioning and configuration.
Reversing valve testing requires both modes
An AC-only system runs in one direction -- the installer tests cooling and calls it done. A heat pump must be verified in both modes because the reversing valve can stick, leak, or fail to shift. Testing only cooling on installation day means a failure goes undetected until the first cold night, which in Las Vegas might be months away.
Dual-fuel configuration adds complexity
Some homeowners pair a heat pump with a gas furnace (dual-fuel or hybrid system). The thermostat must be programmed with a switchover point -- the outdoor temperature where the system stops using the heat pump and switches to gas. In Las Vegas, this balance point is typically 30-35 degrees, meaning the furnace rarely runs. The installer must configure and test the switchover logic.
Thermostat programming is more involved
A heat pump thermostat has settings that do not exist on an AC-only thermostat:
- Compressor lockout temperature: The outdoor temperature below which the heat pump shuts off and auxiliary heat takes over. In Las Vegas, this can be set low (25-30 degrees) because temperatures rarely drop that far.
- Auxiliary heat lockout temperature: The outdoor temperature above which auxiliary heat strips are prevented from activating. Set this at 40-45 degrees in Las Vegas to prevent expensive backup heat from running on mild days when the heat pump can handle the load alone.
- Setback limits: Heat pumps recover temperature slowly compared to gas furnaces. Setting the thermostat back 10 degrees at night (a common strategy with furnaces) causes the heat pump to activate expensive auxiliary heat strips to recover quickly. Program no more than a 2 degree setback at a time, or use a smart thermostat with intelligent recovery that starts the heat pump early to reach the target temperature gradually.
Las Vegas-Specific Installation Considerations
Summer installations and extreme heat
Most Las Vegas heat pump replacements happen between May and September because that is when old systems fail. Crews start at 6:00-7:00 AM to get outdoor work done before peak heat. Indoor temperatures rise 3-5 degrees per hour once the AC is off -- by noon your home may reach 90-95 degrees. Professional crews take mandatory heat safety breaks, which adds time but is a safety requirement.
Concrete pad requirements
Las Vegas soil (caliche and clay layers) expands and contracts with moisture changes. Equipment pads must sit on stable, level ground. Older neighborhoods in North Las Vegas, the Historic District, and areas near the Wash often have soil movement that requires a thicker or reinforced pad.
Refrigerant line insulation and desert UV
Standard foam insulation deteriorates in direct Las Vegas sunlight within 12 to 18 months, exposing bare copper. Exposed suction lines in 115-degree heat cause efficiency loss and compressor overheating. Ensure your installer uses UV-rated insulation or UV-protective wrapping on every exposed section.
After Installation: Permits, Warranty, and Follow-Up
Permit inspection scheduling
Clark County and the cities of Las Vegas, Henderson, and North Las Vegas all require a mechanical permit for HVAC installations. Your contractor should have pulled the permit before installation day. After the work is complete, the contractor schedules a final inspection -- typically within one to two weeks. The inspector verifies electrical connections, refrigerant handling, clearances, and system function. If an issue is found, the contractor corrects it at no additional cost.
Warranty registration: the 60-90 day deadline
Every major manufacturer -- Lennox, Carrier, Trane, Rheem, Goodman -- requires registration within 60 to 90 days to activate the full warranty. Miss the window and your parts warranty drops from 10 years to 5 years. On a compressor that costs $2,000-$3,500 to replace, that is a costly oversight. Confirm who is handling registration before the crew leaves. If the installer says they will do it, follow up within two weeks.
First-month performance check
Check the air filter after two weeks -- construction dust clogs it faster than normal. Monitor your electricity bill for the first full cycle to establish a baseline. Note whether all rooms reach comfortable temperatures. Most quality contractors schedule a 30-day follow-up to verify refrigerant charge, tighten electrical connections, and address concerns. A maintenance plan with The Cooling Company includes priority scheduling for follow-up checks.
Red Flags During Installation: Shortcuts to Watch For
You are not an HVAC technician, but you can still identify warning signs of substandard work:
- No permit pulled: If the installer says permits "aren't necessary," that is a major red flag. Unpermitted work violates code, voids warranties, and creates legal problems when selling. See our guide to HVAC permits in Las Vegas.
- No load calculation: If they sized your system based on "same size as what you had" or square footage, it may be oversized (short cycling, poor dehumidification) or undersized (runs constantly, never reaches setpoint).
- Brazing without nitrogen flow: Oxidation forms inside the copper without nitrogen purge. Those particles clog metering devices and damage compressor valves.
- Skipping or rushing the vacuum: A proper vacuum takes 20 to 45 minutes. Five minutes is not enough -- residual moisture becomes acid that destroys the compressor.
- Not testing heating mode: If the installer only tests cooling, the reversing valve goes unverified. It must be tested on installation day.
- No commissioning documentation: A quality installation includes a written record of pressures, temperature splits, airflow, and electrical readings -- your proof of proper installation for warranty claims.
- Rushing thermostat setup: Heat pump thermostat programming takes 10 to 15 minutes when done correctly. Two minutes of clicking through menus is not proper configuration.
Frequently Asked Questions
How long does a heat pump installation take in Las Vegas?
A standard residential replacement takes 6 to 10 hours. This includes removal, placement, refrigerant line work, electrical connections, thermostat wiring, commissioning, and a homeowner walkthrough. Jobs requiring ductwork modifications, panel upgrades, or dual-fuel configuration may extend to a second day.
Can I stay home during heat pump installation?
Yes, but plan around the lack of cooling. During summer, your home will reach 90+ degrees by midday. Many homeowners leave and return in late afternoon. You need to be present for the initial walkthrough (30 minutes) and the final walkthrough (30 minutes).
What is the difference between installing a heat pump and a regular AC?
The physical installation is similar. The key differences are commissioning and thermostat configuration. A heat pump requires testing in both heating and cooling mode, reversing valve verification, defrost cycle setup, auxiliary heat wiring, and heat-pump-specific thermostat programming. Installation takes roughly 30 to 60 minutes longer than an AC-only swap.
Do I need a permit for heat pump installation in Las Vegas?
Yes. Clark County, Las Vegas, Henderson, and North Las Vegas all require a mechanical permit. Permit fees range from $75 to $250. Unpermitted work can void warranties, create selling liability, and result in fines. Read our guide to HVAC permits in Las Vegas for details.
How soon after installation should I register my warranty?
Within 60 days to be safe. Missing the 60-90 day window drops your parts warranty from 10 years to 5 years. Confirm who is handling registration before the crew leaves. Learn more about HVAC installation warranties.
Why do installers need to test heating mode during a summer installation?
The reversing valve mechanically shifts refrigerant flow between heating and cooling. If it is defective or improperly wired, the heat pump only works in one mode. Testing both modes on installation day catches problems immediately rather than waiting until the first cold night months later.
What should I do during the first month after heat pump installation?
Check the air filter after two weeks. Note whether all rooms reach comfortable temperatures. Compare your first electricity bill to previous months. Listen for unusual sounds and report them to your installer. Schedule a 30-day follow-up visit. A maintenance plan ensures ongoing professional care and priority scheduling.
Schedule Your Heat Pump Installation
The Cooling Company installs heat pumps across the entire Las Vegas Valley -- Las Vegas, Henderson, North Las Vegas, Summerlin, Green Valley, and all surrounding communities. Every installation includes a Manual J load calculation, proper permitting, full commissioning in both heating and cooling modes, thermostat programming, warranty registration assistance, and a 30-day follow-up visit.
We are licensed (NV C-21 #0075849, C-1D #0078611), insured, and rated 4.8 stars from 787 verified reviews. Our installers are NATE-certified and factory-trained on all major brands including Lennox, Carrier, Trane, and Rheem.
Call (702) 567-0707 to schedule a free estimate, or visit our heat pump installation and AC installation pages for more information on equipment options and pricing.