
Short answer: You can safely handle five AC issues yourself: changing air filters, resetting the thermostat, flipping a tripped breaker, clearing a clogged condensate drain line, and cleaning the outdoor unit. These fixes resolve about 30-40% of service calls and cost you nothing. Leave refrigerant issues, electrical problems, compressor noises, burning smells, and ice on coils to a licensed technician — DIY attempts on these can cause $1,500-$5,000 in additional damage or create serious safety hazards.
Look, I'm going to save you money on some calls you don't need to make, and protect you from some DIY attempts that could cost you a compressor.
I've been working on AC systems in the Las Vegas Valley long enough to know two things for certain. First, about a third of the service calls we run could have been resolved by the homeowner in under ten minutes with no tools. Second, about one in five emergency calls we take is because a homeowner tried to fix something they shouldn't have touched and made a $300 problem into a $3,000 one.
This guide is the honest version. No sales pitch. No scare tactics to make you call us for things you can handle. And no YouTube confidence that sends you into your electrical panel without knowing what you're doing.
Here's the decision framework, organized by risk level.
GREEN Zone: Safe DIY Fixes
These are the repairs and resets you can do yourself with confidence. No specialized tools. No risk of making things worse. No refrigerant, no high voltage, no moving parts that can take a finger off.
1. Change Your Air Filter
What's happening: Reduced airflow, warm spots in the house, system running constantly, or ice forming on the indoor coil.
Why it matters: A clogged filter is the single most common cause of AC performance problems in Las Vegas. Our desert dust loads filters faster than almost any other climate in the country. A filter that lasts 90 days in Portland lasts 30-45 days here — less if you have pets, do construction nearby, or live close to an active building site.
Exactly what to do:
- Turn the system off at the thermostat (just switch it to OFF)
- Locate the filter — usually in a return air grille on the wall/ceiling, or at the air handler in the garage or attic
- Slide the old filter out and note the size printed on the frame (e.g., 20x25x1)
- Slide the new filter in with the airflow arrow pointing toward the air handler (toward the ductwork, away from the room)
- Turn the system back on
What you need: A replacement filter ($4-$15 from any hardware store). That's it.
How often in Las Vegas: Every 30-45 days during cooling season (March-October). Every 60-90 days in winter. If you hold the filter up to light and can't see through it, it's overdue.
What it costs if you skip it: A clogged filter forces the blower to work harder, which overheats the motor ($400-$800 to replace). Restricted airflow also drops the evaporator coil temperature below freezing, causing ice buildup that can flood your air handler when it melts. We see this destroy ceilings and drywall in Las Vegas homes every summer — $2,000-$5,000 in water damage from a $10 filter.
2. Thermostat Check and Reset
What's happening: System won't turn on, runs but doesn't cool, or cycles on and off rapidly.
Why it matters: About 15% of our "AC isn't working" calls turn out to be thermostat issues — dead batteries, wrong settings, or the thermostat losing its programming after a power blip (common in Las Vegas, especially during summer when NV Energy's grid is stressed).
Exactly what to do:
- Check the display. If it's blank, replace the batteries (usually 2 AA batteries behind the faceplate)
- Verify it's set to COOL mode, not HEAT or FAN ONLY
- Confirm the set temperature is at least 3-5 degrees below the current room temperature
- Check that the fan is set to AUTO (not ON — ON runs the fan continuously even when the AC isn't actively cooling, which blows room-temperature air and feels warm)
- If the thermostat has a schedule, verify it hasn't reverted to a default program that raises the temperature when you're home
- For smart thermostats (Nest, Ecobee): check if the WiFi connection is active and if any "eco mode" or "away" settings are overriding your preferences
What you need: Possibly 2 AA batteries. Nothing else.
What it costs if you call us instead: Our diagnostic fee for what turns out to be dead thermostat batteries. Save that money for something that actually needs a technician.
3. Breaker Reset
What's happening: System completely dead — no fan, no compressor, nothing. Thermostat may or may not have a display.
Why it matters: Las Vegas homes often have two breakers for the AC system — one for the indoor air handler/furnace and one for the outdoor condenser. If either trips, part or all of the system stops. Breakers trip from momentary power surges, which are common in the Valley during peak summer demand and monsoon storms.
Exactly what to do:
- Go to your electrical panel (usually in the garage)
- Find the breakers labeled "AC," "AIR HANDLER," "FURNACE," or "CONDENSER" — there are typically two
- Check if either is in the middle position (tripped) rather than firmly ON or OFF
- Flip the tripped breaker fully to OFF, wait 30 seconds, then flip it to ON
- Go back inside and set the thermostat to cool. Wait 5-10 minutes — most systems have a time delay to protect the compressor
- If the system starts and runs, you're good
What you need: Access to your breaker panel. No tools required.
CRITICAL: If the breaker trips again within 24 hours, stop resetting it. A breaker that trips repeatedly is protecting you from an electrical fault — a short in the compressor, a grounded wire, or a failing component drawing too much current. Repeatedly forcing it back on can cause a fire or destroy the compressor. At that point, you need a licensed technician for proper diagnosis. Call us for AC repair.
What it costs if you mess this up: Ignoring a repeatedly tripping breaker and forcing it on can burn out a compressor ($1,500-$3,500) or damage wiring ($500-$2,000 for electrical repair). Respect the breaker — it's smarter than YouTube.
4. Clear a Clogged Condensate Drain Line
What's happening: Water pooling around the indoor air handler, water dripping from a ceiling vent, or the system shutting off unexpectedly (many Las Vegas homes have a float switch that kills the AC when the drain pan fills up).
Why it matters: Your AC removes humidity from the air as it cools. That moisture drips off the evaporator coil into a drain pan and exits through a PVC drain line — usually a 3/4-inch white pipe that terminates outside your house or into a utility drain. Las Vegas homes accumulate algae, dust, and mineral deposits in this line, especially during monsoon season when humidity spikes.
Exactly what to do:
- Find where the drain line exits your house (usually a small PVC pipe near the outdoor unit or through a wall)
- If water isn't dripping from it when the AC is running, the line is clogged
- Use a wet/dry shop vac to suction the clog from the exit end — put the vacuum hose over the pipe end, seal it with a rag, and run the vac for 30-60 seconds
- Pour a cup of white vinegar into the drain line access point (usually a T-shaped fitting near the air handler) to kill algae and prevent future buildup
- Do the vinegar treatment once a month during cooling season
What you need: A wet/dry shop vac ($30-$60 if you don't have one — worth owning in Las Vegas) and white vinegar.
What it costs if the drain line stays clogged: Water damage. If the drain pan overflows, you're looking at ceiling drywall repair ($300-$1,500), potential mold remediation ($500-$3,000), and whatever was stored in the vicinity of the leak. All preventable with 10 minutes and a shop vac.
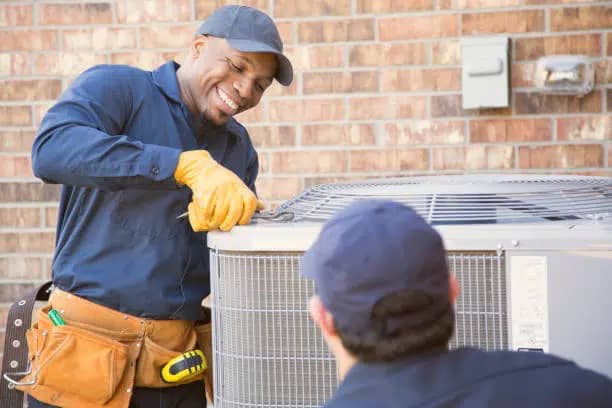
5. Clean the Outdoor Condenser Unit
What's happening: System runs but doesn't cool well, the outdoor unit sounds louder than usual, or you can visibly see dust, cottonwood fluff, or debris caked on the condenser fins.
Why it matters: The outdoor condenser coil rejects heat from your home. When the coil fins are blocked with debris, the unit can't release heat efficiently, which raises refrigerant pressure, stresses the compressor, and reduces cooling capacity by 10-30%. In Las Vegas, dust from construction, monsoon storms, and landscape debris coats these coils constantly.
Exactly what to do:
- Turn the system off at the thermostat AND at the disconnect switch next to the outdoor unit (a small metal box with a pull-out handle)
- Remove any visible debris — leaves, paper, plastic bags, dryer sheets that blew against the unit
- Using a garden hose (NOT a pressure washer), spray the coil fins from the inside out, working from top to bottom. The goal is to push dirt out, not deeper in
- Ensure all landscaping is trimmed at least 18-24 inches from the unit on all sides
- Verify the disconnect switch is firmly back in place and turn the system on at the thermostat
What you need: A garden hose with a standard nozzle. Never use a pressure washer — it bends the delicate aluminum fins and actually worsens performance.
What it costs if you neglect this: A condenser running with 30% reduced airflow can overheat the compressor. Compressor replacement: $1,500-$3,500. Condenser coil rinse: free with your garden hose.
YELLOW Zone: Proceed With Caution
These are tasks where a mechanically confident homeowner might be okay, but there's meaningful risk of making the situation worse or encountering an unsafe condition. If anything feels uncertain, stop and call.
6. Visual Capacitor Inspection
What you can do: Open the outdoor unit's access panel (after turning off the disconnect) and visually inspect the capacitor — a cylindrical metal component about the size of a soda can. If the top is bulging or swollen (it should be flat), or if there's oily residue leaking from it, the capacitor has failed. That's useful diagnostic information to share with your technician.
What you should NOT do: Touch the capacitor or attempt to test it with a meter unless you know how to safely discharge it. Capacitors store electrical charge even when the system is off. A dual-run capacitor can hold enough charge to knock you down or stop your heart. This is not an exaggeration — it's a roughly 370-440 volt charge.
Cost if a pro does this repair: $150-$300 for capacitor replacement.
7. Check Thermostat Wiring
What you can do: Remove the thermostat faceplate and check if any wires have come loose from the terminal screws. Color-coded wires (red, green, yellow, white, blue) connect to matching letter terminals. If a wire popped off, pushing it back in and tightening the screw may restore function.
What you should NOT do: Start testing wires with a meter, jump wires together to "test" the system, or touch wires together to see what happens. Thermostat wires carry 24 volts — not dangerous to you, but shorting the R wire to the C terminal will blow the control board transformer, which is a $150-$400 component plus labor.
8. Inspect Refrigerant Lines
What you can do: Look at the two copper lines running from the outdoor unit to the indoor coil. The larger one (suction line) should be insulated and cold/sweating during operation. If the insulation is missing, damaged, or the line is warm to the touch, there's a performance problem. If you see ice on either line, the system is low on refrigerant or has a severe airflow restriction.
What you should NOT do: Open any valves, remove service caps, or attempt to add refrigerant. Refrigerant handling requires EPA Section 608 certification, specialized tools, and gauges. Getting the charge wrong — even by a few ounces — can destroy a compressor. And releasing refrigerant to the atmosphere is a federal violation with fines starting at $44,539 per day per violation under the Clean Air Act.
RED Zone: Call a Professional
These situations require a licensed HVAC technician. Attempting DIY repair here risks personal safety, equipment destruction, or both. This is not gatekeeping — it's risk management.
9. Refrigerant Issues
Signs: Ice on the evaporator coil or refrigerant lines, warm air from the vents despite the system running, hissing sounds near the indoor coil, or a system that runs continuously but never reaches temperature.
Why you can't DIY this: Refrigerant problems require EPA-certified handling, recovery equipment, electronic leak detectors, a manifold gauge set ($200-$500), and knowledge of the specific charge for your system model (overcharging is as destructive as undercharging). The refrigerant itself costs $50-$150 per pound depending on type, and your system likely needs 2-5 pounds.
What it costs with a pro: $200-$600 for a recharge with leak search. If the leak is in the evaporator coil, add $1,200-$2,500 for coil replacement. Read more about refrigerant leaks and what they mean for your system.
What it costs if you mess it up: Overcharging refrigerant causes liquid slugging, which can crack compressor valves or destroy the scroll set inside the compressor. That's $1,500-$3,500 for a compressor replacement, plus the original leak still isn't fixed.
10. Electrical Component Failures
Signs: Breaker trips repeatedly, burning smell from the outdoor unit or air handler, visible arcing or scorch marks on wiring, humming without starting, or a unit that starts briefly then shuts off.
Why you can't DIY this: AC systems run on 240-volt circuits. Electrical faults in these systems can cause electrocution, fires, and equipment destruction. Even when the breaker is off, capacitors hold stored charge. Diagnosing electrical faults requires an amp clamp, a multimeter, and the training to interpret what the readings mean in context.
What it costs with a pro: $150-$600 for most electrical repairs (contactors, wiring, relays). Call for emergency AC repair if you smell burning or see arcing.
What it costs if you mess it up: Miswiring a contactor can send full voltage to the compressor continuously, burning it out within hours ($1,500-$3,500). Improper electrical work can also void your homeowner's insurance in the event of a fire.
11. Compressor Problems
Signs: Loud grinding, clanking, or screeching from the outdoor unit. The unit vibrates excessively. The system trips the breaker immediately on startup. The compressor hums but doesn't start (possible hard lockup).
Why you can't DIY this: The compressor is a sealed unit containing refrigerant under high pressure (200-400+ PSI on the high side). Attempting to access, test, or replace a compressor without proper recovery equipment, brazing tools, nitrogen purging capability, and a vacuum pump is guaranteed to cause additional damage and environmental contamination.
What it costs with a pro: $1,500-$3,500 for compressor replacement. For systems over 10 years old, full AC replacement might be more economical — a technician can give you the cost-benefit comparison. Read our guide on AC compressor costs for detailed pricing.
12. Burning Smell
Signs: Electrical burning smell, plastic burning smell, or a hot/metallic odor coming from vents or the unit itself.
What to do immediately:
- Turn the system OFF at the thermostat
- Turn OFF both AC breakers at the panel
- If the smell is strong or you see smoke, leave the house and call 911
- If it's mild and dissipates with the system off, call an HVAC company for same-day diagnosis
Why this is never DIY: Burning smells indicate overheating wiring, a failing motor, or a component approaching ignition temperature. These conditions can cause house fires.
13. Ice on the Evaporator Coil or Refrigerant Lines
Signs: Visible ice on the copper lines, frost on the air handler, water leaking from the air handler when the ice melts, or dramatically reduced airflow from the vents.
What to do: Turn the system to FAN ONLY (not off — the fan will help melt the ice gradually) and check the air filter. If the filter is clean and ice is still forming, you likely have a refrigerant issue that requires professional diagnosis.
Why this matters: Running a system with a frozen coil forces liquid refrigerant back to the compressor (liquid slugging), which can mechanically destroy the compressor's internal components. Every minute the system runs in this condition increases the risk of a $1,500-$3,500 repair.
The Real Cost of Getting DIY Wrong
Here's the honest math that should guide your decision-making:
| Problem | Pro Repair Cost | DIY Gone Wrong Cost | What Goes Wrong |
|---|---|---|---|
| Capacitor replacement | $150-$300 | $1,500-$3,500 | Electrical shock, compressor damage from incorrect capacitor |
| Refrigerant recharge | $200-$600 | $2,000-$4,000 | Overcharge destroys compressor, leak still unfixed |
| Thermostat wiring | $100-$200 | $150-$400 | Blown transformer, damaged control board |
| Electrical diagnosis | $150-$400 | $1,500-$5,000+ | Miswired components, fire hazard, voided insurance |
| Contactor replacement | $150-$350 | $1,500-$3,500 | Continuous voltage to compressor, burnout |
| Drain line clearing | Free (DIY) | $300-$3,000 | Water damage if left clogged (not from DIY attempt) |
| Filter change | Free (DIY) | $400-$5,000 | Motor burnout, ice damage, water damage (from neglecting it) |
The pattern: GREEN zone DIY saves you $100-$300 per incident. RED zone DIY gambles $1,500-$5,000 to save $150-$400. The math doesn't work.
Your AC Troubleshooting Quick-Reference
When your AC isn't working, run through this sequence before calling anyone:
- Check the thermostat — batteries alive? Set to COOL? Temperature set below current room temp? Fan on AUTO?
- Check the filter — when was it last changed? Hold it to light. If you can't see through it, change it.
- Check the breakers — both of them (indoor and outdoor). Reset if tripped. If it trips again, stop and call.
- Check the drain line — is water dripping from the exit point? If not, clear it with a shop vac.
- Check the outdoor unit — is it running? Is it visibly dirty? Is anything blocking airflow?
If you've gone through all five steps and the system still isn't working, you've earned the right to make that service call — and you've already eliminated the easy stuff, which means the technician can focus on the real problem instead of charging you to change a filter.
When You Do Need a Pro, Here's What to Expect
A good AC repair service call in Las Vegas looks like this:
- Diagnostic fee: $75-$150 (ours is $89)
- Arrival window: 2-4 hours during summer peak, same-day for emergencies
- Diagnosis: Technician identifies the failed component and explains what happened and why
- Quote: You get a firm repair price before any work starts — parts and labor included
- Decision: You approve the repair or decline. No pressure, no scare tactics
- Warranty: Parts and labor warranted in writing
If any HVAC company pressures you to approve a repair on the spot, declines to give you a written quote, or won't tell you exactly what's wrong before they start working, get a second opinion. A company that does good work isn't afraid of comparison.
For scheduled AC maintenance — which catches most of these problems before they leave you in a 115°F house — a tune-up runs $89-$150 per system. It's the single best investment in avoiding emergency repair bills.
The Bottom Line
You're not helpless when your AC stops working. A filter change, a thermostat reset, a breaker flip, a drain line clearing, or a condenser rinse can solve a surprising number of problems. Do those confidently.
But when you hear grinding, smell burning, see ice, or can't get cool after covering the basics — pick up the phone. The Cooling Company has been doing honest HVAC repair across Las Vegas, Henderson, and North Las Vegas for years. We'll tell you what's wrong, what it costs, and let you decide.
Call (702) 567-0707 or book online for same-day service.
What's the most common AC problem I can fix myself?
A dirty air filter. It's responsible for roughly 25-30% of performance complaints we see in Las Vegas. In our desert environment, filters clog in 30-45 days during cooling season compared to 90 days in more temperate climates. Changing a $4-$15 filter takes two minutes and can restore full cooling performance, prevent ice buildup on the evaporator coil, and avoid blower motor failure ($400-$800 repair).
Can I add refrigerant to my AC system myself?
No — and we strongly advise against it even if you find recharge kits marketed to homeowners. Handling refrigerant requires EPA Section 608 certification by law. Beyond the legal issue, adding the wrong amount can destroy your compressor ($1,500-$3,500). Overcharging causes liquid slugging that cracks internal components. And if you're low on refrigerant, you have a leak — adding more without finding and fixing the leak is a temporary fix that wastes money every time.
How do I know if my AC problem is serious or something simple?
Run through the five-point check: thermostat settings, air filter, breaker, drain line, outdoor unit condition. If the problem resolves with one of those checks, it was simple. If the system still isn't cooling after all five, or if you notice ice, unusual noises (grinding, screeching, clanking), burning smells, or a breaker that trips repeatedly, the problem requires professional diagnosis. The presence of any burning smell or repeated breaker trips means stop using the system immediately.
Is it safe to reset my AC breaker if it keeps tripping?
Reset it once. If it holds and the system runs normally, a momentary power surge likely caused the trip — common during Las Vegas summers when the electrical grid is under peak demand. If the breaker trips again within 24 hours, do not reset it again. A repeatedly tripping breaker indicates an electrical fault: a grounded compressor, a short circuit in the wiring, or a failing component drawing excessive current. Forcing the breaker on repeatedly can cause a fire or destroy the compressor.
How often should I clean my outdoor AC unit in Las Vegas?
Rinse the condenser coil with a garden hose at least 3-4 times during cooling season (April through October). After any dust storm or monsoon event, rinse it within 48 hours. Las Vegas desert dust, construction debris, and cottonwood fluff accumulate on condenser fins faster than in most climates. A dirty condenser can reduce system efficiency by 10-30% and increase the risk of compressor overheating. Always use a standard garden hose — never a pressure washer, which bends the delicate aluminum fins and worsens airflow.
My AC is blowing warm air. Should I try to fix it myself?
Start with the safe checks: verify the thermostat is set to COOL and AUTO, change the air filter if it's been more than 30 days, and make sure both breakers are on. Then check the outdoor unit — is the fan spinning? Is the unit visibly dirty? If the filter is fresh, both breakers are on, the thermostat is correct, the outdoor unit is running and clean, but you're still getting warm air, the problem is likely low refrigerant, a failed compressor, or a refrigerant valve issue — all of which require a professional diagnosis.
What does an AC diagnostic visit actually include?
A proper diagnostic visit ($75-$150, ours is $89) includes: checking thermostat operation and calibration, measuring supply and return air temperatures (the split should be 15-22 degrees), measuring amp draw on the compressor and fan motors, testing capacitors, checking refrigerant pressures with a gauge set, inspecting the condensate drain, evaluating the condenser and evaporator coils, and checking electrical connections. The technician should identify the specific failed component and give you a firm repair quote before starting any work.
How much money can DIY AC maintenance actually save me?
Regular filter changes ($4-$15 per filter, 8-10 per year = $32-$150 annually) combined with monthly drain line maintenance (free) and seasonal condenser cleaning (free) can save you $200-$800 per year by preventing emergency service calls, extending equipment lifespan, and maintaining system efficiency. A clean system runs 10-20% more efficiently than a neglected one, which translates to $15-$40 per month in electricity savings during Las Vegas cooling season.