
Short answer: Run your HVAC system on fan-only mode and feel along duct joints, connections, and seams for escaping air. You can also hold a smoke pencil or incense stick near joints — the smoke will deflect toward leaks. Seal what you find with mastic sealant or UL 181-rated foil tape, never standard duct tape.
Run six quick tests to find leaks at seams, boots, and flex connections. Use a flashlight, smoke source, and a tissue to see airflow. Seal small gaps with mastic or UL 181 foil tape. Call a pro for large leaks or any combustion-appliance risk. (Source: ASHRAE Technical Resources)
Key Takeaways
- Run six simple tests to find common leaks.
- Use mastic or UL 181 foil tape for lasting repairs.
- Call a certified tech for big leaks, safety, or aerosol sealing.
- Sealing ducts can cut energy waste and improve comfort.

Why check your ducts for leaks?
Duct leaks let conditioned air escape before it reaches lived-in rooms. When that happens, your HVAC runs longer to satisfy the thermostat. That extra runtime raises your energy bills and shortens equipment life. Many leaks sit hidden in attics, crawlspaces, or behind walls where you do not notice them until comfort drops.
A planned duct inspection helps you prioritize repairs and avoid bigger problems later. Small fixes at key locations often yield the best payoff. Early fixes can restore airflow balance, reduce run time, and cut cost. If you document leaks and repairs, you also create proof for contractors or rebate programs.
You may qualify for federal tax credits that reduce your upfront cost.
What is a duct leak?
A duct leak is any opening where conditioned air leaves the ductwork or unconditioned air enters the ductwork. Leaks commonly occur at seams, takeoffs, register boots, and where flexible duct meets collars. The lost air can go into an attic, crawlspace, basement, or outdoors rather than into rooms.
Leaks range from pinholes to full disconnections. Small leaks may only affect one room. Large leaks near the air handler or plenum can reduce comfort across the whole house and cause the system to cycle more.
How do leaks affect comfort and bills?
Air that does not reach rooms forces the HVAC to run longer and work harder. This raises energy consumption and can make electric or gas bills go up. Rooms can feel uneven, with hot and cold spots despite normal thermostat settings.
Use our energy savings guide to estimate your potential savings.
Leaky ducts can also increase wear on fans and compressors. In some cases, leaky returns draw dusty or contaminated air into the system, which affects indoor air quality and filter life.
What common signs suggest leaks?
Look for weak airflow at vents and rooms that never reach the thermostat setpoint. Whistling near ducts, visible dust trails, and dirty return grills are common clues. You may see torn insulation or moving insulation where leaks blow air around a trunk.
Visible gaps, a disconnected flex section, and wet spots from condensation also point to issues. If you suspect leaks, document them with photos before you start repairs. (Source: ASHRAE Technical Resources)
Where are ducts located?
Ductwork can run through attics, crawlspaces, basements, walls, and garages. Location affects how much energy you lose. Ducts in unconditioned spaces, like an attic, lose more heating or cooling than ducts that stay inside the conditioned envelope.
Knowing where ducts commonly leak helps you inspect quickly and focus on the worst spots first. Trunk lines, the plenum near the air handler, and major junctions often hold the largest leaks. Start there for the biggest gains.
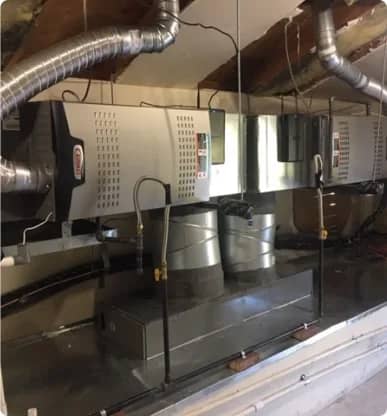
Where to look in the attic?
In the attic, trunk lines and takeoffs commonly show gaps at taped seams and at collar connections. Check where ducts pass through framing and where boots meet ceiling drywall. Torn or missing insulation near a joint often signals that air is escaping.
Walk the attic with the system running if it is safe to do so. Use a flashlight to inspect seams, taped joints, and the area where flex duct connects to sheet metal collars. Note any displaced or blowing insulation and any dust streaming out of seams.
How to inspect crawlspace duct runs?
Crawlspace ducts can be crushed, disconnected, or damaged by rodents. Look for flattened flex sections, loose supports, and disconnected takeoffs. Check collars where flex attaches to trunks and the plenum.
Wear gloves, eye protection, and a mask when you crawl under the house. Move slowly and watch for sharp edges, nails, or damp wood. Take photos of suspect areas so you can compare before-and-after repairs.
Inspecting basement ducts: what to check?
Basement ducts often start at the air handler and show problems at the plenum and takeoffs. Check the connection between the air handler cabinet and the duct plenum. Look for gaps at seams and poorly sealed register boots.
Also watch for rust or condensation stains on ducts. Those signs can indicate moisture problems that harm materials and impair sealant adhesion later on.
Where to check ducts behind walls and ceilings?
Ducts in walls or chases are hard to inspect visually. Use register tests instead. Block a register temporarily and see how other rooms respond. Use a smoke pen or infrared camera to find leaks near access plates, junctions, and grill edges.
When ducts are hidden, a professional duct blaster test may be the most reliable way to measure leakage and find problem areas without invasive work.
How to examine registers and boots?
Remove register grilles and look into the boots when possible. Inspect screw holes, boot seams, and the gap where the boot meets drywall or flooring. A register boot out of alignment or a loose screw often causes drafts.
With the system running, place your hand near the boot to feel airflow. Listen for whistling or vibration. If the boot is loose or the air pattern is disrupted, that register likely needs sealing or adjustment.
What quick DIY tests can I run?
You can run six quick tests that reveal most common duct leaks with low cost tools. These tests work well for a first pass to identify obvious issues. They do not replace professional blower-door or duct-blaster testing, but they point you to the biggest problems.
Perform tests with the HVAC fan set to the normal on setting. Walk through rooms and spaces with a flashlight and your test tools. Document which registers are weak and where smoke or tissue shows movement. That record helps you decide whether to DIY or call a pro.
Visual inspection: where to look?
Begin with a visual sweep of visible ductwork. Check taped seams, insulation, connectors, and collars. Look for loose screws, torn insulation, and missing foil tape.
Dark dust patches or streaks often mark where air is leaking out. Take photos of suspect gaps and note the location for later sealing or to show a contractor.
Smoke or incense test: how to do it?
Light an incense stick or a smoke pencil and hold it near seams and connections while the system runs. Watch the smoke: if it moves away from a seam, that shows air blowing out. If the smoke is pulled inward, that indicates air is entering the duct at that point.
Move the smoke source slowly and test multiple seams. Be cautious in attics and tight spaces. Use a safe, small smoke source and keep a fire extinguisher nearby as a precaution.
Tissue or streamer test at registers?
Hold a light tissue or a narrow streamer near each supply and return register with the system running. A limp tissue means very low airflow. A strong, steady pull or a flapping tissue signals good airflow.
If the tissue flutters irregularly, that may point to turbulence from an upstream leak or obstruction. Mark weak registers and compare them before and after any repairs.
Fan test: feel for escaping air?
With the system running, cup your hand around seams and takeoffs to feel for escaping air. Warm or cool puffs at seams mean conditioned air is lost from the system.
Pay attention to steady winds versus small puffs. Steady airflow at a seam usually means a larger gap that needs a durable seal such as mastic and mesh tape.
Door-closed pressure test: what to watch?
Close exterior doors and run the system. Watch interior doors and note any that move or jamb. A moving door can show pressure imbalances between supply and return.
This test can also show if the house pulls air from a particular area. If a certain door or room reacts strongly, follow up by testing registers and returns in adjacent spaces.
Tape and touch test: how to check?
Run your hand along seams and connections with the fan on to find leaks. For a temporary check, press UL 181 foil tape over suspect gaps to see if comfort improves in nearby rooms.
Do not use cloth or household duct tape for permanent repairs. That tape degrades and fails quickly. Use UL 181 foil tape or mastic designed for HVAC ducts when you make lasting repairs.
Attic access check: what to inspect?
Open attic access and follow trunk lines while the system runs. Look for dust streams, displaced insulation, and any disconnected collars. Moving insulation often marks a persistent leak.
Take photos before you seal anything. Documenting leaks helps you or a contractor prioritize work and show where sealing made the most difference.
How to estimate leak size from smoke?
Observe how quickly and how far smoke moves from a seam. A brief puff that fades usually indicates a very small leak under a few cubic feet per minute (cfm). A steady plume suggests a larger gap that may be tens of cfm.
Use these rough clues to prioritize repairs. Large steady flows near the plenum or trunk often deserve professional attention before you spend time on small boots and joins.
What parts of the six tests identify serious leaks?
Tests that show steady smoke flow from trunk takeoffs or continuous air from the plenum point to major leakage. Multiple weak registers across many rooms also indicate widespread leakage.
Leaks near the air handler or in the return plenum can harm system performance the most. Those are the spots to address first or to report when you hire a technician.

How to interpret test results?
Interpreting your tests helps you decide whether to DIY repairs or call a professional. Small, isolated leaks at register boots are usually good DIY targets. Widespread leakage along trunks, many weak registers, or leaks near combustion appliances generally need a certified tech.
Prioritize repairs that give the most system-wide benefit. Fix leaks near the air handler and main trunk lines first. Then move to takeoffs and finally register boots. Re-test after each set of repairs to see if comfort and airflow improve.
What indicates minor versus major leaks?
Minor leaks are single small gaps at a boot or a tiny tear in flex duct. They show little smoke and often affect one room. These are usually fixed with mastic and UL 181 tape and basic mechanical repairs.
Major leaks show steady and strong airflow at trunks or many weak registers across the house. Large leaks may require a duct blaster measurement and professional sealing or rework of the distribution system.
How to prioritize repairs by impact?
Prioritize work that improves the most rooms. Fix leaks at the air handler and trunk first, then the major takeoffs, and finally the small register boots. That sequence restores system balance and delivers comfort gains faster.
When in doubt, document the issues and consult a technician. A contractor can provide a cfm25 measurement and a clear plan. [Point 1] (Source: ASHRAE Technical Resources)
Estimate savings using ENERGY STAR guidance?
ENERGY STAR shows sealing and insulating ducts is one of the most cost-effective upgrades for many homes. Savings depend on how much ductwork runs through unconditioned space and the current level of leakage.
Homes with attic or crawlspace ducts usually see larger energy and comfort improvements. For a rough savings estimate, track runtime changes and energy bills before and after sealing.
When should I call a professional?
Call a pro when leaks are large, widespread, or near combustion appliances. Professionals can perform a duct blaster test to measure cfm25, run combustion safety checks, and offer aerosol sealing for hard-to-reach leaks.
Also call a pro if you find mold, suspected asbestos, or heavy rodent contamination. Those hazards need trained crews for safe removal, testing, and cleanup. For rebates or warranty work, a certified contractor is often required.
What problems need a certified tech?
Leaks close to gas furnaces, water heaters, or fireplaces pose safety risks. Certified technicians can perform combustion appliance zone testing and ensure sealing does not create backdraft hazards.
Mold, rodent droppings, or damaged insulation are other reasons to halt DIY work and hire professionals who follow safety and abatement rules in your area.
When is aerosol duct sealing recommended?
Aerosol sealing can reach hidden gaps throughout a duct system. A technician injects sealant particles into the duct while the system runs. The particles collect at leak locations and seal them from the inside.
This method works well for long attic trunks and systems with many hidden leaks. It is a professional service and is not a DIY option.
How does a pro perform a duct blaster test?
A contractor seals all registers and attaches a calibrated fan and pressure hood to a main register. They pressurize the ducts to 25 Pascals and measure airflow leakage in cfm25. That number quantifies total duct leakage.
A before-and-after cfm25 report shows how effective sealing was. The measurement also helps compare systems and qualify work for rebates where applicable.
What is the cost range for professional sealing?
Costs vary by region, accessibility, and the testing included. Small jobs sealing a few boots often cost a few hundred dollars. Larger attic-trunk jobs or aerosol sealing can run higher, sometimes over a thousand dollars.
Ask contractors for a written estimate that lists testing, materials, and expected results. That helps compare bids and avoid surprises.
Which contractors are NADCA or certified?
Look for contractors who list NADCA membership or NATE-certified technicians. NADCA members follow cleaning and sealing standards. NATE certification shows technicians have passed industry exams.
Ask a contractor for proof of certification, insurance, and local references. A reputable firm will provide a clear scope, test reports, and warranty terms.
Ready to seal your ducts?
If you are in Las Vegas, Henderson, or North Las Vegas, call The Cooling Company at (702) 567-0707 to schedule a duct inspection. Our technicians test ducts, seal with mastic or UL 181 foil tape, and offer aerosol sealing when appropriate. We provide before-and-after test reports and combustion safety checks. [Point 2] (Source: ASHRAE Technical Resources)
Outside our service area, find NATE-certified technicians at NATE Exchange and choose contractors who follow ENERGY STAR and DOE testing protocols. If you are local, The Cooling Company serves Las Vegas, Henderson, and North Las Vegas and will assess your ducts, recommend fixes, and provide a written estimate.
How to verify contractor credentials and reviews?
Ask for licenses, insurance, and proof of NATE or NADCA certifications. Request references from recent local customers. Look for a clear, written estimate that explains testing and sealing methods.
A trustworthy contractor will explain the expected results and include before-and-after testing in the scope. If rebates are involved, confirm that the contractor meets program requirements.
What safety risks like mold or asbestos require pros?
If you see mold, shredded insulation, or suspect asbestos, stop and hire a professional. Disturbing these materials can spread contamination and expose you to health risks.
A trained crew will sample and test materials, then follow local abatement rules. They can also recommend safe sealing and replacement strategies for contaminated duct sections.
How long do professional repairs usually last?
Properly applied mastic and UL 181 foil tape can last many years under normal conditions. Aerosol sealing also offers durable results. Longevity depends on vibration, pest damage, and moisture.
Ask a contractor about warranty terms and maintenance tips to keep seals intact. Regular visual checks and prompt repair of damaged insulation or panels will extend results.
Will sealing affect HVAC warranty?
Sealing ducts does not usually void HVAC equipment warranties. However, altering combustion appliance venting without proper checks can affect safety and warranties. Always document work and get a combustion safety check when needed.
How does aerosol sealing compare to mastic?
Aerosol sealing reaches hidden leaks and often reduces total leakage more than spot mastic. Mastic and UL 181 foil tape work well for visible seams and boots and cost less. A professional can advise which approach fits your system and budget.
What questions should you ask before hiring?
Ask if the contractor measures leakage and provides a cfm25 report before and after work. Confirm materials used and whether testing is part of the fee. Request references and ask about rebates and warranties.
A good contractor will explain risks, list expected improvements, and put terms in writing.
Final steps and quick checklist?
Before you start, shut off power to the air handler if you will reach into the plenum. Clear attic or crawlspace access paths. Wear gloves, eye protection, and a mask in dusty or tight spaces. Note which rooms feel weak and which registers show low flow.
During your tests, take photos and write down which seams or boots show smoke or feel. After sealing small leaks with mastic or foil tape, retest registers and note any temperature or airflow gains. If you find major leakage or safety issues, call The Cooling Company at (702) 567-0707 in Las Vegas, Henderson, or North Las Vegas.
Checklist:
- Turn off power when working on or near the air handler.
- Do a visual sweep and photograph leaks.
- Run smoke and tissue tests at all registers.
- Seal visible small leaks with mastic or UL 181 foil tape.
- Re-test airflow and document changes.
- Call a certified tech for large leaks or combustion safety checks.
Sources:
- ASHRAE Technical Resources
Contact The Cooling Company at (702) 567-0707 for local inspections, or find certified technicians at NATE Exchange.
Related reading: what to explore next?
About The Cooling Company
- Phone: (702) 567-0707
References
- U.S. Department of Energy (Energy.gov) (accessed 2025-12-27)
- U.S. Environmental Protection Agency (EPA) (accessed 2025-12-27)
- ASHRAE (Standards and guidance) (accessed 2025-12-27)
- ENERGY STAR (Heating & cooling) (accessed 2025-12-27)
Related service: Want to lower your energy bills? Explore our AC maintenance and energy-efficient AC installation services for Las Vegas homeowners.
Need HVAC Service in Las Vegas?
The Cooling Company provides expert HVAC service throughout Las Vegas, Henderson, and North Las Vegas. Our licensed technicians deliver honest assessments, upfront pricing, and reliable results.
Call (702) 567-0707 or visit AC repair, maintenance, heating, or installation for details.