

Short answer: Get HVAC maintenance tips for Lennox CBX32M setup Henderson: quick checklist to confirm mounting, wiring, condensate & airflow; install confidently.
Lennox CBX32M Air Handler Setup Henderson: Quick Setup Checklist (The Cooling Company) (ASHRAE Technical Resources) Short answer: focus on correct mounting, duct connections, controls, and safe refrigerant handling when setting up a Lennox CBX32M. Verify clearances, condensate drain function, and electrical connections before running the unit. Use basic airflow and temperature checks to confirm proper operation after installation.
Key Takeaways
- Verify mounting, clearances, and condensate routing before power is applied.
- Confirm electrical and control wiring matches Lennox diagrams and local code.
- Check airflow, static pressure, and temperature rise to validate setup.

What should you know before you start?
Before work begins, gather documents and confirm site limits. Read the Lennox installation manual and wiring diagram for the CBX32M. Check the unit nameplate for voltage, phase, and blower data. Make sure the air handler size and blower performance match the load calculation and the evaporator coil. This prevents mismatches that cause poor comfort and higher energy bills.
Plan the installation site for service access, filter changes, and condensate management. Confirm clearances for panels and controls. Identify the return-air path and make sure return grilles are not blocked. Determine the condensate route and allow for a trap and an accessible secondary drain. Good planning avoids rework and damage from leaks.
What documentation should you have on hand?
Gather the Lennox installation manual, wiring schematic, and the unit spec sheet. Keep local electrical and plumbing codes available. Have the return-air design and duct plans for the home on hand so you can verify duct sizes and grilles. Proper documentation speeds correct wiring and prevents mismatched controls.
Also keep service tools and test instruments ready: a manometer for static pressure, a clamp ammeter for blower current, and a thermometer for supply and return. These tools let you verify performance at startup and log the readings for future reference.
What safety checks are critical before work begins?
Isolate power and lock out breakers at the service panel. Use a meter to verify the absence of voltage after disconnecting power. Wear personal protective equipment, including gloves and eye protection, and ensure the ladder or platform is stable. These steps reduce the risk of electrical shock and physical injury.
Check for proper ventilation and a clean work area. If brazing refrigerant lines, clear combustible materials and follow safe brazing practices. Ensure that fire protection and a charged fire extinguisher are available when working in attics or confined spaces.
Site access and clearances
Confirm unit placement allows filter removal and service access. The CBX32M must sit on a level pad or platform that supports the weight and keeps the unit stable. Verify clearances required by Lennox for front and rear panel access so future maintenance is possible without moving the unit.
Plan attic or closet installations with condensate management in mind. Make sure there is space to install a secondary drain pan and float switch when required. Tight spaces that block service access increase service time and cost.
Core concepts
A reliable Lennox CBX32M setup depends on three core ideas: airflow, drainage, and controls. Airflow dictates comfort and coil performance. Drainage protects property from water damage and prevents mold. Controls coordinate the air handler with the condensing unit and thermostat to deliver correct staging and fan speeds.
Assess blower type and control options early. The CBX32M may be available with single-speed or multi/variable speed blowers. Matching the controller and thermostat type is critical. Confirm whether the home uses standard 24V controls or communicating controls and wire accordingly.
What is the role of airflow in performance?
Airflow moves heat between the duct system and the evaporator coil. Typical design targets range between 350 and 450 CFM per ton, but actual targets depend on coil design and system goals. Low airflow causes coil frosting and poor dehumidification, while excessive airflow can reduce temperature drop and comfort.
Measure airflow indirectly by checking static pressure across the coil and comparing to the blower performance curve on the nameplate. Correct duct sizes and clean filters are the first fixes for airflow issues.
What are common control types on Lennox handlers?
Lennox handlers accept various control inputs. Many units use standard 24V thermostat signals for on/off or multiple stages. Some models support communicating controls or variable-speed commands. Verify the control board and jumpers before wiring to avoid control conflicts.
Match the thermostat type to the handler. Using a communicating thermostat on a non-communicating handler or the reverse will lead to incorrect staging or fan operation. If unsure, consult the Lennox wiring diagram and test signals at low voltage points.
What drainage details matter most?
Condensate must drain by gravity with a proper trap and uninterrupted fall. Install the primary drain to a visible or accessible location and add a secondary pan and float switch in attics or above finished spaces. Float switches give early warning of primary drain failure to prevent water damage.
Test the drain with a controlled water flow after installation. Look for slow drains, sags in piping that trap water, or improper slope. Use approved piping materials and follow local code for discharge points.
Action plan
A methodical action plan reduces errors. Start with mechanical placement and secure the unit. Then connect return and supply ducts, seal joints, and route condensate. After mechanical work, make electrical and control connections, following the Lennox wiring diagram and local code. Finish with startup tests and documentation.
Before applying power, perform pre-power checks: verify fuse sizes, breaker settings, and that the blower wheel spins freely. Confirm filters are installed and access panels are secured. Check that all low-voltage terminations are tight and properly labeled to prevent miswiring.
What is the step-by-step installation workflow?
Place the air handler on a level pad or support and secure it per instructions. Attach the return and supply ducts using mastic or foil tape; avoid cloth-backed duct tape. Install the condensate trap and route the drain to a safe discharge or statutory receptor. Ensure the drain lines slope properly and are supported.
Connect electrical power last, following the unit wiring diagram and local codes. Verify line voltage, phase, and grounding. Terminate control wiring at the designated terminal block and label each conductor. Reinstall access panels and fasteners before powering up the unit.
When should you charge or connect refrigerant lines?
Match the condensing unit and air handler before brazing refrigerant lines. If the system uses factory-sealed components with factory charge, do not add refrigerant until you verify operating pressures. When you must add charge, evacuate the lines with a vacuum pump and confirm micron levels before release of refrigerant.
After the unit runs, use gauges to check suction and discharge pressures and compare them to expected values. If pressures are out of range, investigate for leaks, restrictions, or incorrect charge before adjusting further.
What startup metrics should you record?
Log supply and return temps, suction and discharge pressures, and blower amperage at startup. Record static pressure across the coil and total external static pressure to confirm duct compatibility. These readings are the baseline for future service and warranty claims.
Note expected temperature split for cooling and the factory-specified static pressure range. Save photos of wiring and drain setup with the startup log so technicians have a clear record if issues appear later.
Optimization
After the basic setup, fine-tune the system for comfort and efficiency. Adjust fan speed profiles if the handler supports variable control. Balance the ductwork to improve room-to-room comfort. Small changes, such as sealing leaks and correcting dampers, can yield significant improvements in runtime and noise.
Use a manometer, thermometer, and clamp ammeter to measure performance before and after adjustments. Monitor the system over the first week of operation to catch settling issues and to verify that condensate drains and controls behave as expected.
Browse our project portfolio to see examples of our installation work.
How do you troubleshoot low airflow?
Check filters first and replace if clogged. Inspect ducts for crushed or collapsed sections and seal visible leaks. Verify that all supply and return grilles are open and unobstructed. If problems persist, check the blower wheel for buildup and the motor for proper speed and amperage.
If static pressure remains high after these checks, inspect the evaporator coil for dirt or blockages. A dirty coil can reduce airflow and heat transfer. Cleaning or replacing the coil may be necessary to restore proper performance.
How do you handle noisy operation?
Identify whether noise comes from vibration, loose panels, or the blower. Tighten mounting screws and secure panels first. Check for duct resonance and add insulation or flexible connectors where the duct meets the unit to reduce vibration transfer.
If the blower is the source, inspect the wheel for balance and debris. Worn bearings or damaged wheels may require replacement. Addressing root causes prevents recurring noise and reduces wear on components.
What metrics indicate a healthy system?
A healthy Lennox CBX32M shows steady airflow, expected temperature drop, and stable pressures. For many cooling systems, expect a 16 to 22 degree Fahrenheit drop across the coil. Motor amperage should be near the nameplate value without frequent trips or overloads.
Static pressure should stay within manufacturer limits. Excessive external static pressure can shorten motor life and reduce airflow. Record these metrics at startup and during routine service to spot trends early.
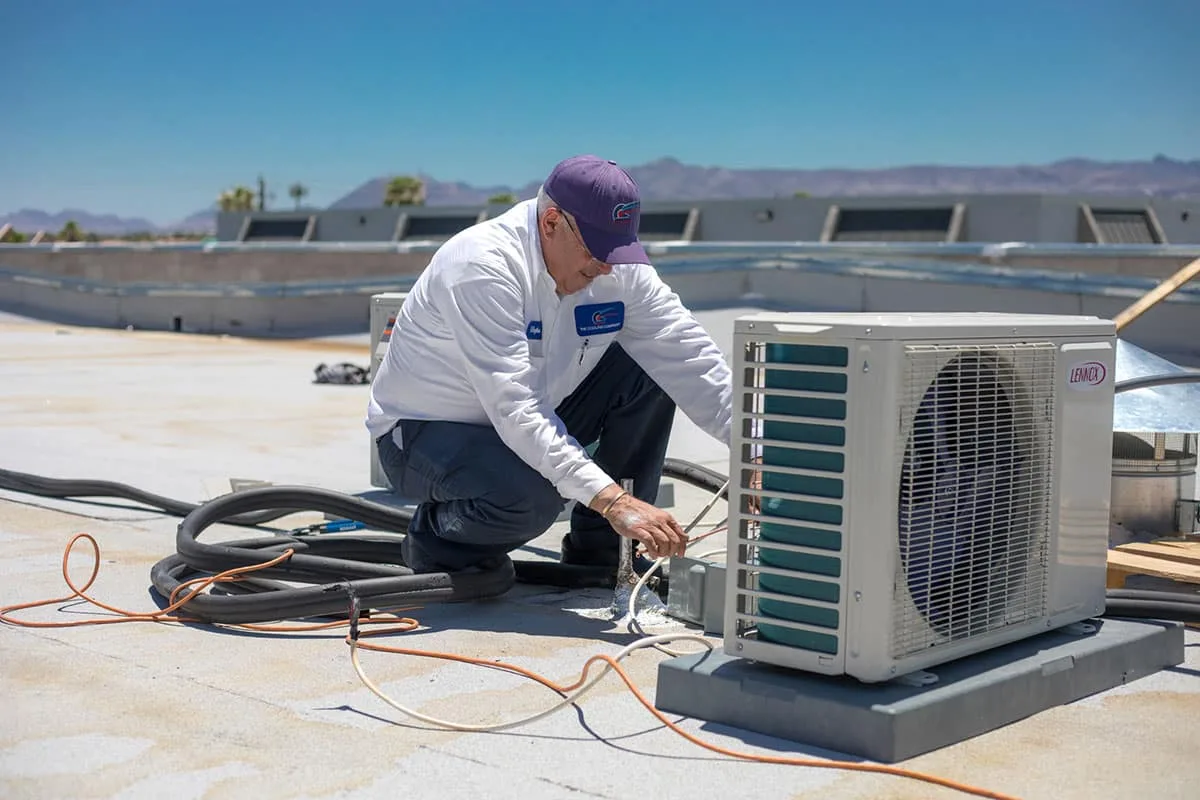
Case study: a typical Henderson install
A mid-size Henderson home needed an air handler swap and duct sealing. Technicians confirmed the Lennox CBX32M matched the calculated load and had appropriate blower performance. They installed the unit on a level platform and sealed all duct joints with mastic to reduce leaks.
The crew added a secondary condensate safety switch and resealed the attic ductwork. They logged startup readings and provided the homeowner a clear report. Within one day, the home felt quieter and achieved more even cooling across rooms.
What lessons are common from local installs?
Measure before you act. Many local problems come from blocked returns or undersized ducts. A quick duct survey often reveals leaks or restrictions that will limit the new handler's performance. Fixing those issues upfront reduces callbacks.
Take climate into account. In hot, arid areas near Henderson or Las Vegas, attic installations need reliable condensate protection and good insulation. Moisture control and proper drain design prevent mold and water damage over time.
What checks saved this homeowner time and money?
A pre-install duct pressure test found a large return leak. Fixing that leak kept the new handler from overworking and eliminated a likely cause of future failures. The team also installed a float switch on the drain to prevent attic water damage from a slow clog.
These small checks - duct sealing and a secondary drain device - avoided callbacks and extended equipment life. Documenting the startup numbers also helped the homeowner track the improved performance.
Installation report sample
Record the model and serial numbers, voltage and phase, and the measured startup metrics. Include supply and return temperatures, static pressure, blower amperage, and refrigerant pressures. Take photos of wiring and drain plumbing for warranty and service records.
A concise report helps technicians and owners understand the baseline. When future service occurs, the technician can compare current readings to the original startup numbers and quickly identify trends.
Ready for professional help?
If you are in Las Vegas, Henderson, or North Las Vegas, call The Cooling Company at (702) 567-0707 for Lennox setup and service. Our team offers on-site checks, NATE-certified technicians, and warranty-aware installs. We can verify wiring, perform startup tests, and leave a clear report for your records.
If you are outside the Las Vegas area, ask for NATE-certified technicians when you hire locally. Those techs understand manufacturer specs and safe practices. For readers near Las Vegas, The Cooling Company serves Las Vegas, Henderson, and North Las Vegas and can schedule same-day or next-day service.
What should I ask a contractor before hiring?
Ask for proof of insurance and references for similar Lennox installs. Confirm they follow the Lennox wiring and startup instructions and that they will record startup metrics. Request a written estimate that lists parts, labor, and warranty handling to avoid surprises.
Also ask whether the techs are NATE-certified and if they will provide a copy of the startup report and photos. A professional service will document the work and explain any follow-up recommendations.
How do I book service with The Cooling Company?
Call (702) 567-0707 for service in Las Vegas, Henderson, or North Las Vegas. Describe the model number and any symptoms you see. The scheduler will confirm a time window and tell you what to prepare for the technician visit.
In many cases, same-day appointments are available. Provide the unit nameplate details and any observed signs, such as poor airflow or water at the drain, so the tech arrives prepared.
Final notes and next steps
Document the installation by saving the startup readings and photos of wiring and condensate connections. Keep a copy of the Lennox manual with these notes. Re-check the condensate line and airflow after the first week to catch settling issues early.
Measure twice and act once when adjusting controls or refrigerant charge. If you prefer a professional to handle the whole job, contact The Cooling Company at (702) 567-0707 for service in Las Vegas, Henderson, or North Las Vegas. A careful setup saves time and money over the equipment life.
You Might Also Like
This aspect deserves careful consideration as you evaluate your options. Understanding the details helps you make more informed decisions. Consulting with qualified professionals provides additional insights specific to your situation. Take time to consider how this information applies to your particular needs and circumstances. Making well-informed choices typically leads to better long-term outcomes and greater satisfaction.
- "troubleshooting hvac odors"
- "ruud furnace problems"
- "trane furnace repair henderson"
- "how much to install hvac system in old house"
- "urgent ac repair las vegas"
Need HVAC service help in Las Vegas?
If you're facing an HVAC emergency in Las Vegas, Henderson, or North Las Vegas, The Cooling Company offers fast, reliable service from licensed technicians. We understand that heating and cooling emergencies don't wait for business hours.
Call us now at (702) 567-0707 for emergency service. Our team is ready to help restore your comfort quickly and safely.
About The Cooling Company
The Cooling Company has been serving the Las Vegas valley with professional HVAC services for over a decade. Our team of licensed, NATE-certified technicians specializes in air conditioning repair, heating system maintenance, and complete HVAC installations. We're committed to providing honest, reliable service with upfront pricing and a 100% satisfaction guarantee on all work performed.
- Phone: (702) 567-0707
- Reviews: 4.8/5 stars (780+ reviews) - See reviews
Service Areas
We proudly serve homeowners and businesses throughout the Las Vegas metropolitan area, including Las Vegas, Henderson, and North Las Vegas. Our service technicians are available for same-day appointments in most areas, with emergency service available 24/7 for urgent HVAC issues.
References
- U.S. Department of Energy (Energy.gov) (accessed 2026-01-01)
- U.S. Environmental Protection Agency (EPA) (accessed 2026-01-01)
- ASHRAE (Standards and guidance) (accessed 2026-01-01)
- ENERGY STAR (Heating & cooling) (accessed 2026-01-01)
Need HVAC Service in Las Vegas?
The Cooling Company provides expert HVAC service throughout Las Vegas, Henderson, and North Las Vegas. Our licensed technicians deliver honest assessments, upfront pricing, and reliable results.
Call (702) 567-0707 or visit HVAC services, HVAC maintenance, heating, or AC repair for details.