
Ductwork Troubleshooting: 5 Fast Checks to Fix Leaks Now
Short answer: Quick ductwork checks find leaks, blockages, and disconnected runs that steal comfort and money. Do five simple tests with a flashlight, a smoke source, and basic tools to spot high-impact problems. In Las Vegas, leaky ducts waste 15-30% of cooled air in hot attics (temperatures can reach 150°F), significantly increasing energy bills. Seal and insulate obvious leaks using mastics or UL 181 foil tape (not cloth-backed duct tape), then call a pro for pressurized testing and hard-to-reach fixes. Professional duct sealing costs $600-$1,200 but can save $100-$300 annually in Las Vegas by reducing wasted cooled air and shortening system runtime. Begin with registers, filters, and visible runs to spot big, cheap wins.
Quick ductwork checks find leaks, blockages, and disconnected runs that steal comfort and money. Do five simple tests with a flashlight, a smoke source, and basic tools to spot high-impact problems. Seal and insulate obvious leaks, then call a pro for pressurized testing and hard-to-reach fixes. (Source: ASHRAE Technical Resources)
Key Takeaways
- Begin with registers, filters, and visible runs to spot big, cheap wins.
- Use mastics or UL 181 foil tape, not cloth-backed duct tape.
- Insulate and seal ducts in unconditioned spaces for the best savings.
What is ductwork troubleshooting?
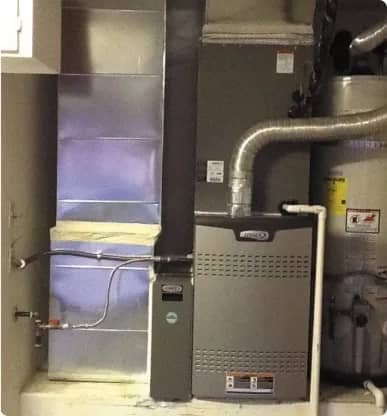
Ductwork troubleshooting is a step-by-step process to find why rooms feel too hot, cold, or stuffy. It combines visual checks, simple airflow tests, and advanced measurements. The aim is to find leaks, blockages, or poor routing that reduce comfort and make HVAC equipment run longer.
In a home, ducts deliver conditioned air from the air handler to rooms and return air back to the equipment. Technicians and homeowners inspect both supply and return paths. Without balance, rooms stay uncomfortable, energy use rises, and equipment wears faster.
How do ducts affect comfort?
Ducts control where air goes and how much each room gets. If a duct leaks or a run is pinched, that room gets less conditioned air and drifts from setpoint. Uneven temperatures show up as hot or cold rooms and longer run times on the thermostat.
Airflow also affects humidity control in cooling seasons. Low airflow across the coil cuts dehumidification and raises indoor moisture. That change feels sticky and can encourage mold in damp climates.
Why do duct leaks raise bills?
Leaky ducts lose conditioned air into attics, crawlspaces, or walls instead of living spaces. The system must run longer to replace the lost conditioned air. Longer run times increase electricity or fuel use and raise monthly bills in most climates.
If your ducts need replacement, our ductwork replacement cost guide helps you budget the project. For details on how ducts affect overall system performance, read about ductwork and HVAC efficiency.
Return leaks add hidden load because the blower pulls in unconditioned air. The system then cools or heats that extra air, raising energy use. Fixing leaks reduces waste and shortens run cycles.
When should I suspect a leak?
Suspect leaks when some rooms never reach thermostat setpoint or when one side of the house stays warmer. Long run cycles with little temperature change are a strong sign. Smells of attic dust, or a whistling noise near registers, also point to leaks.
If filters are new and the system still underperforms, ducts are a likely cause. Also check ducts after attic work or if the HVAC was recently replaced. New equipment needs intact ducts for full benefit.
Where are common leak points?
Common leaks appear at the plenum-to-duct connections, register boots, takeoff collars, and taped seams. Flexible ducts often pull free where they meet collars. Cloth-backed tape at joints usually fails over time.
Inspect long runs that pass through unconditioned spaces. Seams exposed to movement or building settling also fail. Start repairs at these common spots because they are often the easiest to fix and give big gains.
Can leaks harm indoor air quality?
Yes. Return-side leaks that draw attic, crawlspace, or garage air bring dust, pollen, and insulation fibers into the system. The blower pushes those contaminants into living spaces and may affect people with allergies or asthma. (Source: ASHRAE Technical Resources)
Sealing return leaks and improving filtration reduce the risk. If the system draws air from potential contaminant sources, solve leaks first and consider added ventilation or filtration as needed.
What are the 5 fast checks?
The five fast checks detect the most common duct problems without special tools. They are quick, low-risk, and reveal many issues homeowners can fix or document. Use these checks to decide whether to DIY or call a professional.
Start with registers and filters, look along visible ducts, then test seams and connections with smoke or incense while the blower runs. If these checks don’t help, move to measurement-based tests like static pressure.
Can I check leaks myself?
Yes. Many leaks show on a simple walkthrough with a flashlight and a smoke source. Inspect accessible areas like attics, basements, and crawlspaces. Look for loose collars, split flex ducts, and gaps at the plenum seams.
Use an incense stick or smoke pencil near suspect seams while the system runs. Watch the smoke for air movement. Leaks push smoke outward or draw it inward, making them easy to find.
What tools do I need?
For basic checks, bring a flashlight, screwdriver, utility knife, and a small container of mastic or UL 181 foil tape. Incense sticks or a smoke pencil greatly speed leak finding. Gloves and a dust mask help in attics.
If you plan to measure, add a digital manometer and an anemometer for register airflow. For full leakage numbers, professionals use a duct blaster. Don’t use cloth-backed tape for sealing.
How to check for visible gaps?
Inspect the plenum where the air handler joins the ductwork. Look for missing screws, split seams, and old tape that has wrinkled or come off. Tighten or reattach loose connections before sealing.
Check register boots above ceilings and in attics. Boots that have pulled away or sag will drop air into the ceiling cavity. That loss often creates sizable comfort problems and is easy to fix.
Is pressurization testing useful?
Yes. A duct blaster quantifies leakage in CFM at 25 Pascals and helps prioritize sealing. It gives a measurable baseline and shows where most leakage occurs. That data helps estimate energy savings from sealing.
Pros often pair a duct blaster with a blower door to see how much conditioned air leaves to unconditioned spaces. Use these tests when visible fixes do not restore comfort.
When to reseal seams?
Reseal seams when tape is failing, mastic is cracked, or you see dust lines at joints. If you feel air escaping while the blower runs, the seals need repair. Attic seams are high priority because losses cost most there.
Use proper materials: mastic and UL 181-rated foil tape. Clean and dry surfaces before applying sealant. Reseal during mild weather for safe attic work and better adhesive performance.
Which checks deliver biggest savings?
Some repairs offer faster payback than others. Sealing and insulating ducts in unconditioned spaces usually give the biggest energy and comfort gains. Fixing major disconnected runs and sealing returns follow close behind.
Crushed or undersized ducts and high external static pressure reduce system capacity. These issues can require parts or labor to fix, so measure before investing heavily. Prioritize small, high-impact repairs first.
Will sealing reduce my bills?
Yes. Sealing ducts and adding insulation in attics or crawlspaces typically lowers heating and cooling costs. Homes with large leakage often see bigger savings, while tighter systems show smaller gains. Savings depend on local climate and energy prices. [Point 1] (Source: ASHRAE Technical Resources)
For example, a home leaking 15 percent of conditioned air can recoup a large share of that loss after sealing. Attic ducts give the strongest returns due to large temperature differences.
Which sealants work best?
ENERGY STAR and industry pros recommend approved mastics and UL 181-rated foil tapes for durability. Mastic is paste-like and bonds well to metal and flex ducts. Foil tape is easier to apply on clean seams.
For per-foot pricing on new ductwork, see our ductwork cost per linear foot guide.
Use mechanical fasteners plus mastic or foil tape at collars and takeoffs. Follow manufacturer instructions and allow mastics to cure fully for best longevity.
Are duct tapes effective?
Cloth-backed duct tape is not a long-term solution. It often fails under heat and humidity changes, especially in attics. Replace old cloth tape with mastic or UL 181 foil tape for lasting seals.
For a temporary fix in conditioned spaces, foil tape can work short-term. Plan to upgrade any cloth tape found during an inspection.
How to insulate exposed ducts?
Wrap exposed metal ducts in HVAC-rated insulation with a vapor barrier or use pre-insulated duct sections where appropriate. In many climates, R-6 to R-8 is a good attic target, but check local code for exact values.
Seal seams before insulating so the insulation traps conditioned air. Install insulation without compressing it and tape the jacket seams to reduce air intrusion.
Can disconnected runs be reattached?
Often yes. Reattaching a flex duct usually requires sliding it over the collar, tightening a clamp. Sealing with mastic or foil tape. Ensure crimps remain inside the collar for a tight fit.
If access is limited or the flex is damaged, a contractor may need to replace the segment or open drywall. Reattached runs can restore large amounts of airflow when they were a primary loss point.
How to spot crushed or collapsed ducts?
Look for flat spots, sharp kinks, or long unsupported stretches in flex ducts. Properly installed flex ducts should have smooth curves and supports every few feet to avoid collapse. Visual inspection catches many cases.
If flow is weak and a run looks pinched, replace that segment. Hidden collapses may show up in static pressure measurements or persistent room imbalance.

How will you know fixes worked?
After sealing, you should see shorter run cycles, faster temperature recovery, and fewer hot or cold rooms. Comfort often improves right away. Energy bills may follow over the next billing cycles as run-times drop.
For objective proof, use a digital manometer to compare total external static pressure before and after repairs. A duct blaster can show reduced leakage in CFM25. Keep before-and-after photos and measurements for records.
What performance signs improve first?
Comfort balance and run-times usually improve first. Rooms that were far from setpoint come closer, and the blower reaches the thermostat faster. Less whistling at registers is another quick sign of success.
Humidity control often improves when airflow returns to design levels. Watch for reduced musty smells or dust moving after return leaks are sealed.
How to check airflow at registers?
Use an anemometer or a vane hood for accurate register airflow (CFM). For a quick DIY check, compare how strongly air blows from registers in similar rooms. Weak flow in one room often points to a blocked or damaged run. [Point 2] (Source: ASHRAE Technical Resources)
To quantify, measure supply and return temperatures and calculate airflow using known design values. A pro can map room-by-room CFM and adjust dampers to balance the system.
When to retest with a pro?
Retest if comfort problems persist after DIY repairs or if static pressure still reads high. Also retest when you plan major work like equipment replacement or full duct replacement. Pros use retesting to confirm results.
If odors, high humidity, or health issues continue, schedule a pro to check for return leaks and contamination. Certified techs can provide before-and-after reports that help with rebates.
If you are planning a ductwork installation in Las Vegas, learn what to look for in contractor bids and commissioning reports.
When should you call a pro?
Call a professional for system-level problems, safety concerns, or when tests show major leakage. Examples include very high static pressure, duct blaster CFM25 showing large losses, and return leaks drawing attic or garage air. These need trained diagnosis and repair.
Professionals can run manometer and duct blaster tests, perform internal sealing, and balance airflow. They also handle structural access, complex reroutes, and code compliance. Use certified HVAC contractors for best results.
What tests do HVAC pros run?
Pros commonly use a digital manometer to measure total external static pressure and a duct blaster to quantify leakage at 25 Pascals. They may also use flow hoods to measure room CFM and thermal cameras to find insulation gaps.
Blower door tests can be paired with duct blaster results to show conditioned air loss to unconditioned spaces. These tests guide effective sealing and balance work.
Is a duct blaster necessary?
A duct blaster is necessary when you need precise leakage numbers or when problems seem widespread. It gives a clear baseline and shows where major losses occur. Use it for large sealing jobs or to qualify for rebates.
For small, visible leaks, a duct blaster may not be required. Choose the test based on the scale of problems and desired documentation.
How much do repairs typically cost?
DIY fixes like sealing a few seams often cost under $100 for materials. Professional sealing and insulation jobs usually run $600 to $1,200 for typical single-family homes. Major reroutes or replacements can go from $1,500 to $5,000 or more.
Costs vary by region, duct access, and the amount of work in attics or finished ceilings. Ask for itemized estimates and before-and-after testing plans to compare bids.
Will sealing extend equipment life?
Yes. When ducts are sealed and airflow improves, the HVAC system cycles less and experiences less stress. That can reduce wear on compressors, motors, and other parts, which may extend equipment life.
Sealing is not a complete warranty. Combine duct repairs with routine maintenance and proper refrigerant charge checks for the best equipment longevity.
Can you DIY complex joins?
Complex joins inside plenums, in-wall trunks, or behind finishes can be difficult and risky for DIYers. These tasks may need special tools and access. Professionals have the right equipment and experience.
Simple reattachments and accessible seam sealing are fine for homeowners. Avoid cutting drywall or working near gas lines and electrical panels without proper licensure and training.
What safety prep is required?
Turn off the HVAC power before working at the air handler. Wear gloves, eye protection, and a dust mask in attics. Use proper ladder technique and ensure stable footing while working above ceilings. [Point 3] (Source: ASHRAE Technical Resources)
Stop work if you suspect asbestos, mold, or structural hazards. Call licensed professionals for hazardous material handling and for any work that requires permits.
Are there rebates or incentives?
Many utilities and local programs offer rebates for duct sealing, insulation, and whole-home upgrades. A duct blaster test before and after often supports rebate claims. Check local programs for eligibility and requirements.
Ask contractors if they know about local incentives and whether they provide the test reports needed for rebates. Rebates can lower out-of-pocket costs and improve payback periods.
Ready to stop duct leaks?
Fixing ducts often gives fast comfort and measurable energy wins. Start with the five fast checks and do the easy repairs. If problems persist, measure static pressure and leakage, then hire a pro with documented test results for larger work.
If you live in Las Vegas or the nearby area, call The Cooling Company at (702) 567-0707 to schedule a duct assessment. The Cooling Company provides duct blaster testing, sealing with mastic and UL 181 foil tape, and insulation upgrades. Service areas include Las Vegas, Henderson, and North Las Vegas.
What to include in a service request?
When you call, describe symptoms, rooms affected, and when the issue started. Note the date filters were last changed and whether ducts run through an attic or crawlspace. Ask for a duct blaster test, static pressure measurement, and an itemized repair plan.
Request references, contractor certification, and written warranties. If you want local rebates, ask the contractor to provide pre- and post-test reports that meet program rules.
Call to action
Las Vegas area homeowners: schedule duct testing and sealing with The Cooling Company. Call (702) 567-0707 to book a duct diagnostic in Las Vegas, Henderson, or North Las Vegas. The Cooling Company provides written reports, uses UL 181-rated materials and mastic. Offers a workmanship guarantee for sealing and insulation.
Non-local readers: find reputable, NATE-certified technicians at natex.org for qualified contractors in your area. Insist on UL 181-rated materials or mastic for sealing, document before-and-after conditions. Check for local rebates to lower your cost.
What maintenance keeps ducts working?
Regular maintenance keeps ducts efficient and extends system life. Replace or clean filters every one to three months based on use. Inspect exposed ducts each season for loose joints, failed tape, or animal damage. Keep attic vents clear and insulation intact.
Schedule HVAC tune-ups annually. A technician will check the blower, coils, and return paths. Balance checks during service help maintain airflow and comfort. Record maintenance and repairs to track system health.
How often inspect ducts?
Inspect visible ducts at least once a year and after major attic work or storms. In attics, check more often because temperatures are extreme and tape ages faster. Look for new gaps, displaced insulation, or pest damage.
Recheck seals annually after any sealing work. In high-dust or high-humidity areas, inspect more often. Keep photos and notes to spot trends over time.
What seasonal checks help efficiency?
Before summer, verify cooling airflow, check for collapsed ducts, and clean coils and filters. Before winter, inspect exposed ducts for missing insulation and tighten loose connections. Seasonal checks prevent small issues from growing.
Swap filters at season changes, test thermostat calibration, and check damper settings. These routine steps keep the system running efficiently and reduce the chance of costly repairs.
Fix Your Ductwork and Restore Home Comfort
Ductwork troubleshooting helps find the root cause of comfort and efficiency problems. Use five fast checks to find obvious leaks, reseal with proper materials, and insulate ducts in unconditioned spaces. Measure leakage and static pressure when DIY fixes do not restore performance.
Document symptoms and any repairs before hiring a technician. Professional tests like duct blaster and manometer readings give a clear basis for larger investments. Prioritize sealing and insulating attic ducts for the fastest energy and comfort gains.
Related reading: what to explore next?
About The Cooling Company
- Phone: (702) 567-0707
Share This Page
References
- U.S. Department of Energy (Energy.gov) (accessed 2025-12-27)
- U.S. Environmental Protection Agency (EPA) (accessed 2025-12-27)
- ASHRAE (Standards and guidance) (accessed 2025-12-27)
- ENERGY STAR (Heating & cooling) (accessed 2025-12-27)
Related service: Need ductwork service in Las Vegas? Explore our AC repair and AC maintenance services for Las Vegas homeowners.
Need HVAC Service in Las Vegas?
The Cooling Company provides expert HVAC service throughout Las Vegas, Henderson, and North Las Vegas. Our licensed technicians deliver honest assessments, upfront pricing, and reliable results.
Call (702) 567-0707 or visit ductwork, duct repair, duct cleaning, or duct inspection for details.